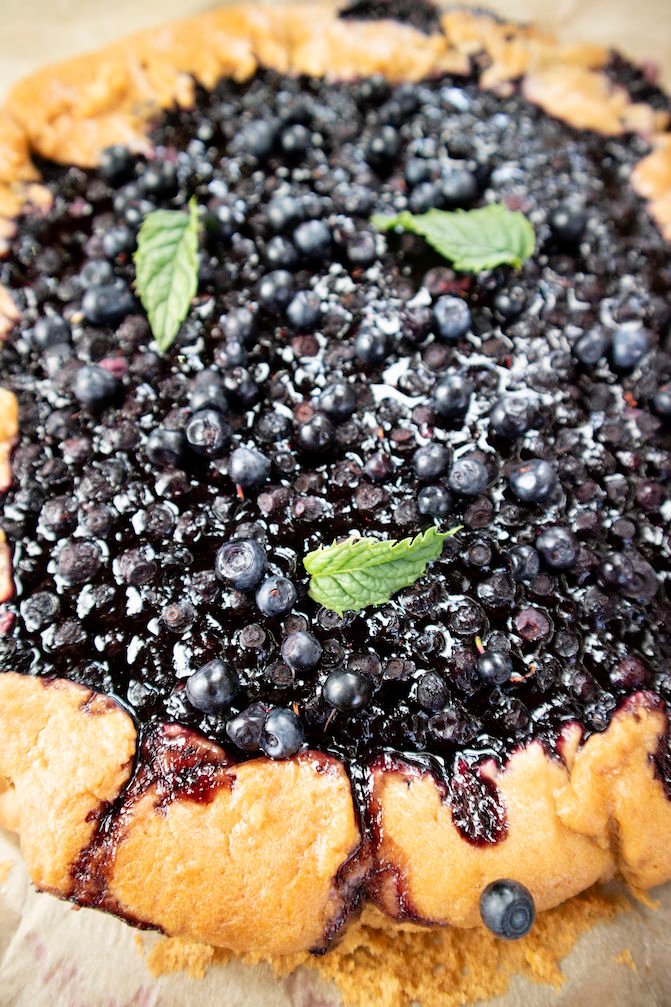
I’ll tell you why wild blueberry pie beats regular blueberry pie every time—those tiny wild berries pack an incredibly intense sweet-tart punch that cultivated varieties simply can’t match. You’ll need about 6 cups of wild blueberries, sugar, lemon zest, and a flaky crust. Bake for roughly 70 minutes. The real secret? Let it cool for at least four hours so the filling sets properly and doesn’t turn into fruity soup when you slice it. Stick around to discover the techniques that’ll make your pie absolutely unforgettable.
I made two of these pies after purchasing 12 cups of wild blueberries ($40 CDN in September 2025) at Atwater Market, a farmer’s market near my home. I ate one right away and froze the other. Instructions for freezing are below.
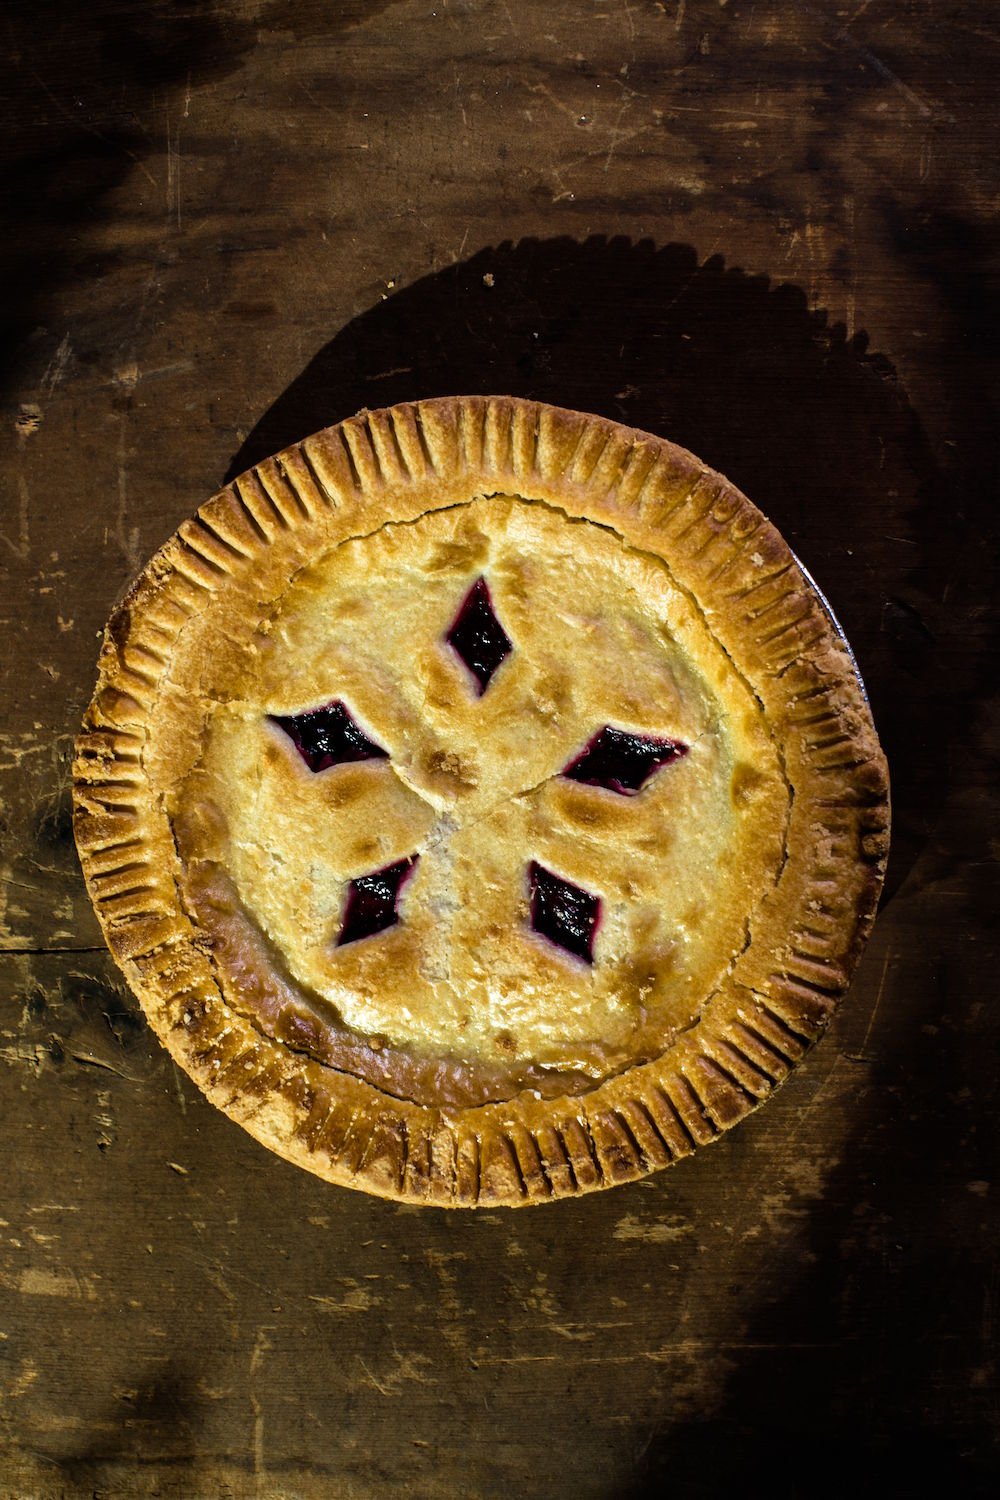
Why You Will Love Wild Blueberry Pie This At Lunchtime (or Dinner)
While most people think of pie as strictly dessert territory, wild blueberry pie breaks all the rules and makes a surprisingly delightful addition to your lunch or dinner table. I love how the tart-sweet berries complement savory dishes—imagine a slice alongside roasted chicken or pork tenderloin—the natural acidity cuts through rich foods beautifully.
At the same time, the flaky crust adds satisfying texture. You’ll discover that wild blueberries pack more intense flavor than their cultivated cousins, making each bite pop with concentrated berry goodness. Trust me, once you’ve experienced pie as a side dish, you’ll wonder why you waited so long.
Recipe for an Excellent Wild Blueberry Pie
Wild Blueberry Pie
Ingredients
- 1 bottom pie crust
- 1 top pie crust or lattice crust
- 6 cups wild blueberries
- 3/4 cup granulated sugar
- 2 tablespoons brown sugar optional
- 1 tablespoon lemon zest
- 2 tablespoons lemon juice
- 1/4 teaspoon salt
- 3 tablespoons cornstarch
- 2 tablespoons all-purpose flour
- 3 tablespoons butter cut into small pieces
- 1 egg beaten (for egg wash)
- 1 tablespoon coarse sugar for sprinkling optional
Equipment
- 9-inch Pie Dish
- Rolling Pin
- Small bowl
- Saucepan (optional)
- Pastry Brush
- Aluminum Foil
Method
- Start by rolling out your bottom crust and fitting it snugly into your pie dish, then pop it in the refrigerator to chill while you work on the filling.
- In a large bowl, gently combine the wild blueberries (6 cups) with granulated sugar (3/4 cup), brown sugar (2 tablespoons) if using, lemon zest (1 tablespoon), lemon juice (2 tablespoons), and salt (1/4 teaspoon). In a separate small bowl, whisk together the cornstarch (3 tablespoons) and flour (2 tablespoons) until completely smooth, then gently fold this mixture into the berries to avoid bursting too many of those precious little gems. Suppose you want extra insurance against a runny pie.
- In that case, you can warm about half of this berry mixture in a saucepan over medium heat, stirring carefully until it just starts to thicken and bubble, then combine it back with the remaining raw berries for the perfect balance of set filling and fresh fruit texture.
- Preheat your oven to 425°F and retrieve your chilled bottom crust from the fridge. Pour the berry filling into the prepared crust, making sure to scrape every last bit from the bowl, then dot the surface evenly with small pieces of butter (3 tablespoons).
- Cover with your top crust or create a lattice pattern if you’re feeling fancy, then seal and crimp the edges firmly to prevent any delicious filling from escaping during baking.
- Brush the entire top surface with beaten egg (1 egg) and sprinkle with coarse sugar (1 tablespoon) if you want that bakery-perfect sparkle. Slide the pie into your preheated oven and bake for 20 to 25 minutes until the top crust begins to set and take on some color.
- Reduce the temperature to 375°F to 400°F and continue baking for another 40 to 50 minutes, watching for the filling to bubble enthusiastically in the center and the crust to turn a deep, gorgeous golden brown. If the edges start browning too quickly, tent them with strips of aluminum foil to prevent burning.
- Once done, remove the pie and let it cool completely at room temperature for at least 4 hours before even thinking about slicing into it.
Nutrition
Notes
Tried this recipe?
Let us know how it was!Nothing beats the sweet-tart burst of wild blueberries nestled in a flaky, golden crust. This wild blueberry pie takes about 30 minutes to prepare and requires roughly 70 minutes of baking time, but trust me, every minute is worth it when you bite into those jammy berries surrounded by buttery pastry. Wild blueberries are smaller and more intensely flavored than their cultivated cousins, making them absolutely perfect for pie filling.
The magic happens when you combine fresh berries with just the right amount of thickener and a touch of lemon to brighten everything up. We’ll walk through rolling out that bottom crust, creating a filling that won’t turn your pie into blueberry soup, and getting that gorgeous golden-brown finish that makes everyone’s mouth water. The hardest part? We are waiting for it to cool properly so the filling sets up perfectly.
Ingredients:
- 1 bottom pie crust
- 1 top pie crust or lattice crust
- 6 cups wild blueberries
- 3/4 cup granulated sugar
- 2 tablespoons brown sugar (optional)
- 1 tablespoon lemon zest
- 2 tablespoons lemon juice
- 1/4 teaspoon salt
- 3 tablespoons cornstarch (or arrowroot)
- 2 tablespoons all-purpose flour
- 3 tablespoons butter, cut into small pieces
- 1 egg, beaten (for egg wash)
- 1 tablespoon coarse sugar for sprinkling (optional)
Equipment/Tools:
- 9-inch pie dish
- Rolling pin
- Large mixing bowl
- Small bowl
- Measuring cups and spoons
- Saucepan (optional)
- Pastry brush
- Aluminum foil
- Wire cooling rack
Instructions:
Start by rolling out your bottom crust and fitting it snugly into your pie dish, then pop it in the refrigerator to chill while you work on the filling.
In a large bowl, gently combine the wild blueberries (6 cups) with granulated sugar (3/4 cup), brown sugar (2 tablespoons) if using, lemon zest (1 tablespoon), lemon juice (2 tablespoons), and salt (1/4 teaspoon).
In a separate small bowl, whisk together the cornstarch (3 tablespoons) and flour (2 tablespoons) until completely smooth, then gently fold this mixture into the berries to avoid bursting too many of those precious little gems. Suppose you want extra insurance against a runny pie.
In that case, you can warm about half of this berry mixture in a saucepan over medium heat, stirring carefully until it just starts to thicken and bubble, then combine it back with the remaining raw berries for the perfect balance of set filling and fresh fruit texture.
Preheat your oven to 425°F and retrieve your chilled bottom crust from the fridge. Pour the berry filling into the prepared crust, making sure to scrape every last bit from the bowl, then dot the surface evenly with small pieces of butter (3 tablespoons).
Cover with your top crust or create a lattice pattern if you’re feeling fancy, then seal and crimp the edges firmly to prevent any delicious filling from escaping during baking.
Brush the entire top surface with beaten egg (1 egg) and sprinkle with coarse sugar (1 tablespoon) if you want that bakery-perfect sparkle. Slide the pie into your preheated oven and bake for 20 to 25 minutes until the top crust begins to set and take on some color.
Reduce the temperature to 375°F to 400°F and continue baking for another 40 to 50 minutes, watching for the filling to bubble enthusiastically in the center and the crust to turn a deep, gorgeous golden brown. If the edges start browning too quickly, tent them with strips of aluminum foil to prevent burning.
Once done, remove the pie and let it cool completely at room temperature for at least 4 hours before even thinking about slicing into it.
Nutrition Information:
- Calories: Approximately 380 per slice (8 servings)
- Carbohydrates: 65g
- Fat: 12g
- Protein: 4g
- Fiber: 4g
- Vitamin C: 15% daily value
- Antioxidants from wild blueberries
Tips:
The cooling time isn’t just a suggestion; it’s absolutely essential for getting clean slices instead of a purple mess on your plate. If you’re impatient like me, you can speed things up by cooling the pie for 2 hours at room temperature, then finishing the process in the refrigerator.
Don’t have wild blueberries? Regular blueberries work fine, though you might want to add an extra tablespoon of lemon juice to compensate for their milder flavor. Running low on cornstarch? You can substitute with an equal amount of tapioca starch, or use all flour instead; just increase the total to 5 tablespoons. And here’s a baker’s secret: if your bottom crust tends to get soggy, try blind baking it for 10 minutes before adding the filling.
Cooking Steps
I’ll walk you through making this wild blueberry pie step by step, and trust me—it’s easier than you might think. We’ll start by getting that crust ready and chilled, mix up our berry filling with just the right balance of sweet and tart, then assemble everything before giving it the perfect two-stage bake. The hardest part? Waiting for those essential four hours for it to cool completely, but I promise it’s worth every minute of that torture.
Step 1. Prepare and Chill Crust
Roll out your bottom crust with confident, gentle strokes, working from the center outward until you’ve got a circle that’s about 12 inches across—don’t worry if it’s not perfectly round, rustic charm never hurt anyone. Carefully drape it over your pie dish, letting gravity do most of the work. Gently press the dough into the corners without stretching—think of it as tucking in a sleepy child. Trim excess, leaving about an inch overhang for crimping later. Pop this beauty into the fridge while you tackle the filling; chilled dough behaves better than unruly teenagers.
Step 2. Mix Berry Filling Ingredients
Fresh wild blueberries deserve respect, so let’s treat them like the tiny jewels they are. I gently combine my berries with sugar, lemon zest, lemon juice, and a pinch of salt in a large bowl. The citrus brightens those deep, earthy flavors beautifully. In a separate small bowl, I whisk together cornstarch (or arrowroot) and flour—this dynamic duo prevents soggy bottoms while thickening the juices. Then I fold this mixture into the berries with the gentlest touch possible. No aggressive stirring here; we’re coaxing flavors together, not making smoothies. The filling should look glossy and well-coated.
Step 3. Assemble and Seal Pie
With our filling ready to shine, it’s time for the grand assembly where patience meets artistry. I pour the berry mixture into my chilled crust, watching those jewel-toned berries nestle perfectly. Next, I dot the surface with butter pieces—think of them as tiny flavor bombs that’ll melt into pure bliss. Now comes the fun part: covering with either a lattice top (fancy!) or a full crust with strategic vents. I seal those edges firmly, crimping with fork tines or fingers, then brush everything with egg wash for that golden finish we’re all craving.
Step 4. Bake at High Heat
Now we’re ready to release some serious oven magic, and I’m cranking that heat up to 425°F because this pie deserves a dramatic entrance. This initial blast of high heat works like a superhero cape for your crust—it’ll puff up beautifully and start developing that gorgeous golden color we’re after. I’ll bake it for 20-25 minutes at this temperature, watching for the top crust to begin setting. Think of it as the pie’s first impression moment—we want bold, confident browning that screams “I’m absolutely delicious” before we dial things back.
Step 4. Cool Before Slicing
Four long hours—that’s the minimum patience tax you’ll need to pay before diving into your masterpiece, and trust me, I know it feels like culinary torture when that pie is sitting there looking absolutely irresistible. But here’s the thing: cutting too early turns your beautiful creation into blueberry soup with crust croutons. The filling needs time to set properly, transforming from molten lava into sliceable perfection. If you want clean, Instagram-worthy slices, pop it in the fridge after cooling. Your future self will thank you for this act of remarkable self-control and strategic dessert planning.

Helpful Tips
Since wild blueberry pie can be a bit finicky, I’ve got some tricks up my sleeve that’ll save you from common pitfalls. First, toss those berries with your dry ingredients while they’re still frozen—this prevents color bleeding and mushiness. If your filling seems too liquidy, don’t panic! Pre-cooking half the mixture creates a jammy base that helps thicken everything. Always use a clear glass pie dish so you can check the bottom crust’s doneness. Finally, resist the urge to slice early—I know it’s torture, but patience rewards you with clean, beautiful slices instead of blueberry soup.
Pairings
While wild blueberry pie stands beautifully on its own, the right pairing transforms it from a delicious dessert to an unforgettable experience. I’m partial to vanilla ice cream—the cold creaminess plays beautifully against warm, bubbling berries. Fresh whipped cream offers lighter elegance, while a drizzle of heavy cream creates rustic charm. Coffee lovers, rejoice: this pie pairs magnificently with morning brew or evening espresso. For wine enthusiasts, try a late-harvest Riesling or port—the sweetness complements without competing. Sharp cheddar might sound odd, but trust me on this classic combination. The tangy cheese balances the fruit’s sweetness perfectly.
Freezing Your Wild Blueberry Pie
As mentioned above, I had 12 cups of wild blueberries, enough for two pies. I opted to bake them both at the same time and freeze the second. It’s been in my freezer, taunting me, for about a month. I’ll likely defrost it in a couple of weeks. Luckily, freezing a baked blueberry pie is like pressing pause on that perfect moment.
First, let the pie cool completely. And yes, completely means room temperature all the way through. Any lingering warmth will create condensation in the freezer, and no one wants soggy crust syndrome. Once it’s cool, wrap your masterpiece tightly—first in plastic wrap, then in foil, or tuck it neatly into a large freezer bag. Think of it as a little pastry parka.
Label it with the date (future you will thank you) and pop it into the freezer. It’ll stay delicious for up to four months. When it’s time to relive the magic, just unwrap and place it on a baking sheet. Bake at 375°F (190°C) for about 30–40 minutes, until it’s heated through and the crust is once again proud of its golden glow. If the edges start browning too soon, drape a piece of foil over them like a tiny sun hat.
Freezing an Unbaked Blueberry Pie
Now, for the planners and overachievers in the room—this one’s for you. Freezing an unbaked pie means you get that “freshly baked from scratch” smell weeks later, without lifting a mixing spoon.
Assemble your pie completely, filling and all, but skip the oven part. Place it (in its pan) on a baking sheet and freeze it uncovered for a couple of hours until firm to the touch. This quick chill—called a flash freeze—prevents the crust and filling from fusing into a single frozen blob.
Once it’s firm, wrap it like you mean it: two layers of plastic wrap, one layer of foil. Label with the date and “Unbaked Blueberry Pie,” then store flat in the freezer for up to three months.
When you’re ready for pie day, there’s no need to thaw (really, don’t). Unwrap it, brush the crust with an egg wash if you want that glossy bakery look, and bake at 425°F (220°C) for 20 minutes. Then reduce the temperature to 375°F (190°C) and continue baking for another 40–50 minutes, until the filling is bubbling and your kitchen smells like blueberry heaven.
If, like me, you used a Pyrex pie plate, I would strongly recommend defrosting first.
And if you’re the cautious type, you can shield the crust edges halfway through baking with foil to keep them from getting too tan.
🥧 Freezing a Baked Blueberry Pie
Already baked the beauty? No problem. Think of the freezer as a “pause button” for peak pie.
- Cool completely. Truly room temperature all the way through. Warm pie + freezer = condensation → soggy crust.
- Wrap like a pro. First plastic wrap (snug), then foil or slide into a large freezer bag. Consider this the pie’s parka.
- Label & store. Date it, name it, and freeze flat. Best within up to 4 months for flavour and texture.
- Reheat to glory. Unwrap, place on a baking sheet, and bake at 375°F (190°C) for 30–40 minutes, until hot and crisp again. If edges brown early, tent with foil.
Pyrex Alert: If, like me, you used a Pyrex pie plate, I would strongly recommend defrosting first — glass doesn’t love the shock of going from frozen solid to oven-hot. It tends to… voice its objections rather dramatically.
Pro Tip: Metal pie pans handle chill-to-heat better than glass — less thermal shock, fewer “uh-oh” moments, and your crust stays delightfully crisp instead of nervously cautious.
🫐 Freezing an Unbaked Blueberry Pie
Planner mode engaged. This route delivers that fresh-baked aroma on demand, future you cheering in the background.
- Assemble fully. Crust, filling, top crust or crumb — everything but the baking.
- Flash-freeze, uncovered. Set the pie (in its pan) on a baking sheet and freeze 2–3 hours until firm. This prevents squish and keeps layers distinct.
- Wrap tightly. Two layers of plastic wrap + one layer of foil. Label with date and “Unbaked Blueberry Pie.” Store flat for up to 3 months.
- Bake from frozen. Do not thaw. Unwrap, optional egg wash for gloss, then bake at 425°F (220°C) for 20 minutes. Reduce to 375°F (190°C) and bake another 40–50 minutes, until the filling bubbles and the crust is golden. Shield edges with foil mid-bake if needed.
Plan Ahead Tip: Flash-freezing gives you the best of both worlds — a flaky, bakery-fresh crust and filling that stays where it belongs (not seeping into your dough while you sleep). Future you will be impressed, possibly smug.
Why no thaw? Thawing lets juices soak the crust. Straight-from-frozen keeps things flaky and happy.
Summing it up
After exploring all these wonderful pairings, let’s step back and appreciate what makes wild blueberry pie truly special. It’s the perfect balance of sweet and tart that dances on your tongue, wrapped in buttery, flaky pastry. I’ve found that wild blueberries pack more punch than their cultivated cousins—they’re smaller but mighty in flavor. The key lies in proper preparation: letting that filling bubble until it’s just right, cooling patiently (I know, torture!), and serving with confidence. Whether you’re feeding family or impressing guests, this pie delivers pure summer magic in every single bite.

