Published January 24, 2026 · Updated June 18, 2026
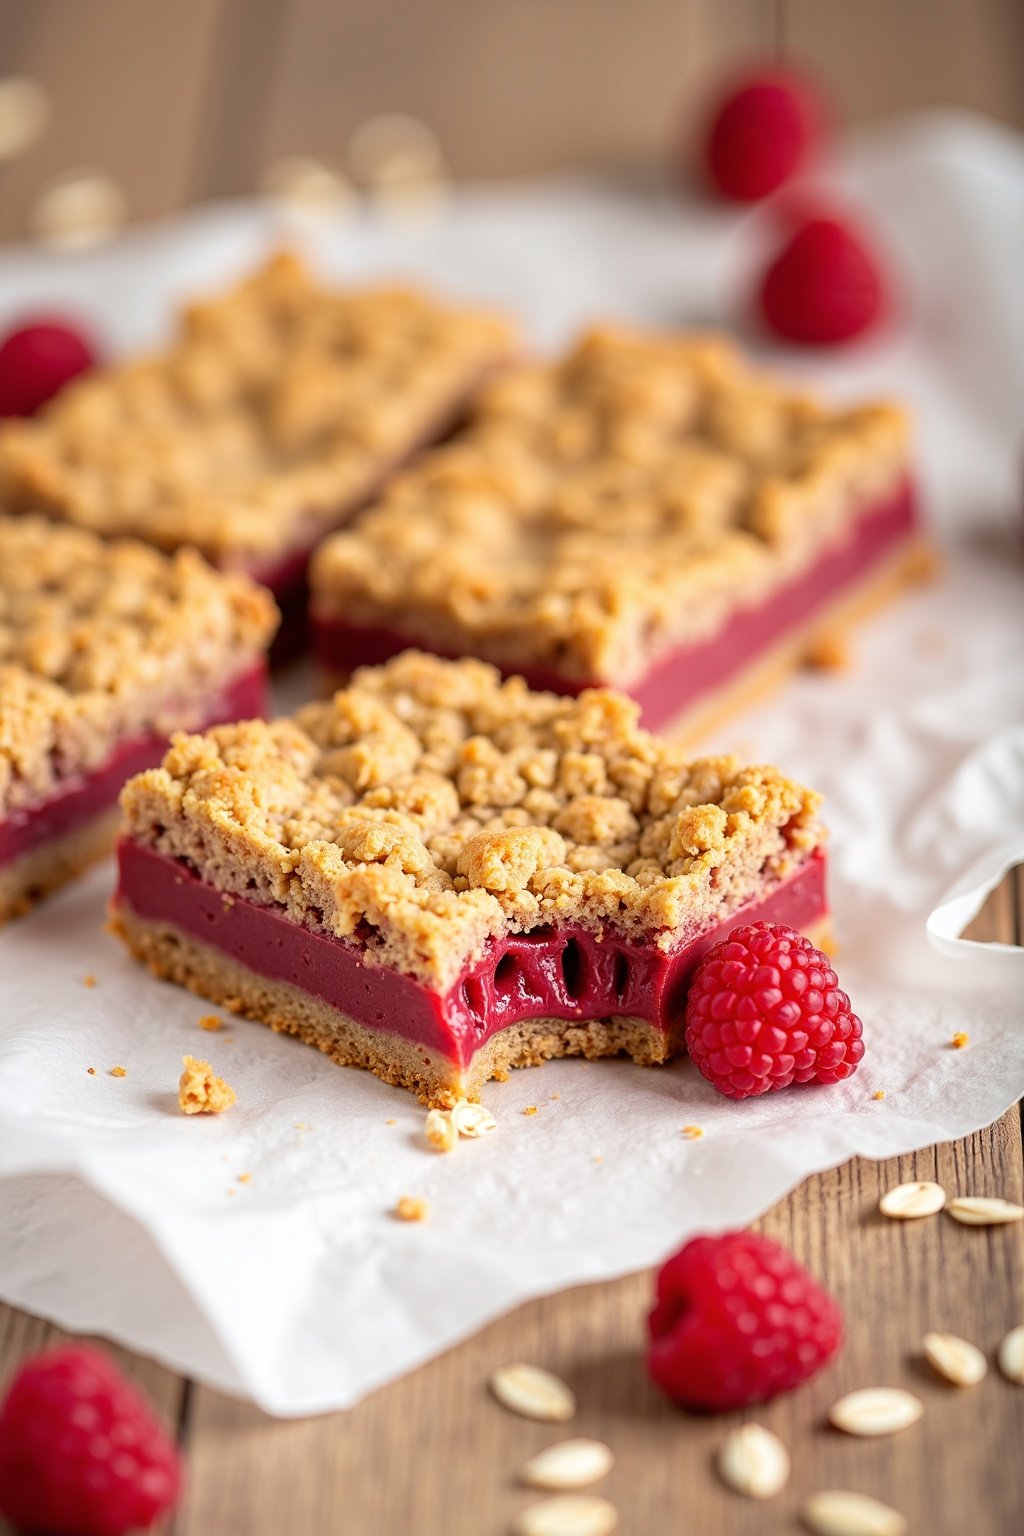
Tired of soggy, disappointing lunch box treats? These homemade raspberry bars solve everything—they’re sturdy enough to survive backpack adventures, wholesome enough to keep parents happy, and delicious enough that kids actually finish them. With a buttery oatmeal base, jammy raspberry filling, and golden crumb topping, these bars deliver steady energy without the sugar crash.
Quick Stats
Why These Raspberry Bars Are Perfect for Lunch Boxes
Sturdy & Portable: The firm oatmeal base prevents crumbling during transport, while the set filling won’t create sticky messes in backpacks or lunch boxes.
Balanced Nutrition: Each bar delivers 3g protein and 4g fiber from whole grains and real fruit—providing steady energy without artificial additives or sugar crashes.
Make-Ahead Convenience: Bake once, enjoy for weeks. These bars stay fresh refrigerated for 7 days and freeze beautifully for up to 3 months individually wrapped.
Kid-Approved Taste: Sweet-tart raspberry filling combined with buttery crumb topping creates a flavor kids consistently choose over store-bought alternatives.
Homemade vs. Store-Bought Raspberry Bars
| Factor | Store-Bought | Homemade | Benefit |
|---|---|---|---|
| Calories | 220 | 180 | -40 (18%) |
| Sugar | 22g | 14g | -8g (36%) |
| Fiber | 1g | 4g | +3g (300%) |
| Ingredients | 15+ (preservatives) | 10 (whole foods) | Real ingredients |
| Cost per Bar | $1.25 | $0.65 | -$0.60 (48%) |

Homemade Raspberry Bars (Perfect Lunch Box Treat)
Ingredients
Equipment
Method
- Preheat oven to 350°F. Line a 9×13-inch baking pan with parchment paper, leaving overhang on sides for easy removal.
- In a large bowl, beat softened butter until light and fluffy, about 3 minutes. Add egg and vanilla extract, beating well after each addition.
- In a separate bowl, combine flour, oats, 1 cup sugar, baking powder, and salt. If desired, pulse oats briefly in food processor until coarsely ground.
- Mix dry ingredients into wet ingredients until mixture resembles coarse crumbs. Reserve 1½ cups of the mixture for topping.
- Press remaining crumb mixture firmly and evenly into prepared pan to form the base.
- For filling: In a medium saucepan, combine raspberries, ½ cup sugar, cornstarch, and lemon juice. Cook over medium heat, stirring frequently, until mixture thickens and coats the back of a spoon, about 5-7 minutes.
- Spread raspberry filling evenly over the base, reaching all corners without disturbing the crust.
- Sprinkle reserved crumb mixture over filling with a gentle touch (don’t press). Top with sliced almonds if using.
- Bake for 35-40 minutes, until edges turn light golden brown and filling gently bubbles.
- Let cool completely in pan on wire rack before cutting into 16 squares (4×4 grid).
Nutrition
Notes
Tried this recipe?
Let us know how it was!Chef Tips for Perfect Raspberry Bars
Achieve the Perfect Crumb Texture: Pulse oats briefly in a food processor until coarsely ground, leaving some whole pieces. This creates the ideal balance between structure and tenderness—too fine becomes cake-like, too coarse falls apart.
Prevent Soggy Bottoms: Cook the raspberry filling until it coats the back of a spoon before spreading. The cornstarch needs full activation to create a jammy consistency that won’t seep into the crust.
Master the Layering Technique: Press the base firmly with slightly damp hands to create an even foundation, but sprinkle the top layer gently—don’t press it down. This contrast creates the signature tender-yet-sturdy texture.
Room Temperature = Success: Let butter and eggs come to room temperature before mixing. Cold ingredients don’t incorporate properly, resulting in dense, tough bars instead of tender, crumbly perfection.
The Cooling Secret: Resist cutting into warm bars! Let them cool completely (2-3 hours) to allow the filling to set properly. For clean cuts, refrigerate for 30 minutes, then use a sharp knife wiped between each slice.
Storage and Serving Suggestions
Refrigerator Storage: Store cooled bars in an airtight container with wax paper between layers to prevent sticking. They’ll maintain freshness for up to 7 days—perfect for weekday lunch packing.
Freezer Storage: Wrap individual bars in plastic wrap, then place in a freezer-safe container or bag. Freeze for up to 3 months. Thaw overnight in the refrigerator or let sit at room temperature for 30 minutes before packing.
Meal Prep Strategy: Dedicate one Sunday afternoon to bake a double batch. Cut and individually wrap bars while watching your favorite show, then stock the freezer. You’ll have grab-and-go treats ready for weeks of lunch boxes.
Complete the Meal: Pair raspberry bars with protein-rich lunches like turkey wraps, hard-boiled eggs, or Greek yogurt parfaits. Add fresh fruit, crunchy vegetables with hummus, and a water bottle for a balanced, satisfying meal.
Serving Temperature: These bars taste delicious at room temperature, making them ideal for lunch boxes without refrigeration for 4-5 hours. They also work beautifully as a warm after-school snack—just microwave for 10-15 seconds.
Creative Variations to Try
Once you’ve mastered the classic recipe, experiment with these delicious twists:
Mixed Berry Medley: Combine raspberries, blackberries, and blueberries (2 cups raspberries + 1 cup mixed berries) for a triple-berry explosion of antioxidants and flavor complexity.
Chocolate-Raspberry Indulgence: Fold ½ cup mini dark chocolate chips into the base mixture, then drizzle cooled bars with melted white chocolate for an elegant dessert.
Nutty Crunch Addition: Add ½ cup toasted pecans or walnuts to the crumb mixture, or sprinkle ¼ cup sliced almonds on top before baking for extra protein and satisfying texture.
Stone Fruit Fusion: Replace half the raspberries with diced fresh peaches or plums during the summer months for a delightful seasonal variation that captures late-summer harvest flavors.
Tropical Paradise: Mix raspberries with diced mango, then add ½ teaspoon coconut extract to the filling for an exotic twist that transports your taste buds to island beaches.
Cream Cheese Frosting: Beat 4 oz softened cream cheese with 2 tablespoons butter, 1 cup powdered sugar, and ½ teaspoon vanilla. Spread over cooled bars for a tangy, bakery-style finish.
Frequently Asked Questions
Can I use frozen raspberries instead of fresh?
Yes! Frozen raspberries work beautifully. Thaw them completely and drain excess liquid before cooking into filling. You may need to add 1-2 minutes to the cooking time to evaporate extra moisture. The texture and flavor will be nearly identical to fresh raspberries.
How do I prevent my raspberry bars from falling apart when cutting?
The key is patience—let bars cool completely (2-3 hours) before cutting. For the cleanest cuts, refrigerate for 30 minutes to firm up the filling, then use a sharp knife wiped clean between each slice. The parchment paper overhang also helps—lift the entire slab out before cutting for easier handling.
Can I make these bars gluten-free?
Absolutely! Replace the all-purpose flour with a 1:1 gluten-free baking blend (like Bob’s Red Mill or King Arthur). Make sure your oats are certified gluten-free. The texture may be slightly more crumbly but equally delicious. Add 1 teaspoon xanthan gum if your blend doesn’t include it.
Why did my raspberry filling turn out too runny?
Runny filling happens when the cornstarch doesn’t fully activate. Make sure to cook the filling over medium heat until it visibly thickens and coats the back of a spoon—this takes about 5-7 minutes. Don’t skip the lemon juice, as the acid helps the cornstarch work properly. If using frozen berries, drain excess liquid before cooking.
You Might Also Like
5 Deliciously Healthy School Lunch Classics: Homemade Twists
Transform nostalgic cafeteria favorites into wholesome lunch box winners with these healthier homemade versions kids actually want to eat.
3 No-Heat Wraps Perfect for Office Lunches
Skip the microwave with these fresh, flavorful wraps that stay delicious at room temperature—ideal for busy workdays and packed lunches.
10 No-Cook Lunches Perfect for Summer Office Days
Beat the heat with refreshing lunch ideas that require zero cooking—perfect for hot summer days when turning on the oven feels impossible.
Vietnamese Egg Coffee: A Unique Coffee Experience
Discover Hanoi’s creamy, dreamy egg coffee—a luxurious afternoon pick-me-up that pairs perfectly with homemade treats like raspberry bars.
Final Thoughts
These homemade raspberry bars prove that lunch box treats don’t have to compromise between convenience and nutrition. With their sturdy texture, balanced ingredients, and make-ahead flexibility, they’ve earned their place as a family favorite that busy parents can feel good about packing. Whether you’re prepping Sunday batches for the week ahead or baking a special treat for afternoon snacks, these bars deliver consistent deliciousness that both kids and adults appreciate.
Medical Disclaimer: The nutritional information provided in this article is for informational purposes only. While we strive for accuracy, individual responses to foods vary. Always consult with your healthcare provider or registered dietitian about dietary changes, especially regarding children’s nutrition and any food allergies or sensitivities.
