Published June 4, 2026 · Updated June 26, 2026
Busy night, empty tank, no plan? These quick and easy dinner recipes are built for exactly that. Nine fast, family-friendly mains that lean on one-pan, sheet-pan, and Instant Pot shortcuts, most ready in under 40 minutes, from bright one-pan lemon chicken to a fragrant Thai green curry. Real dinners, minimal cleanup, zero stress.
Quick Stats: All 9 Dinner Recipes
Nutrition varies by recipe. See each recipe card for exact macros.

Each of these dinners checks the same three boxes: fast hands-on prep, simple ingredients, and easy cleanup. Below you will find why these methods work, how they compare to ordering in, and all nine recipes.
Why This Recipe Works
One pan does the work: Sheet-pan and one-pan dinners roast protein and vegetables together, so the oven does the cooking and you are left with a single dish to wash.
The Instant Pot saves time: Dishes that usually simmer for hours, like beef stew, come together in a fraction of the time under pressure without losing that slow-cooked flavour.
Protein-forward and filling: Most of these mains land between 23g and 38g of protein per serving, which is what makes a quick dinner actually satisfying.
Built for leftovers: Stews, soups, marinated chicken, and curry all keep and reheat well, so one dinner easily becomes tomorrow’s lunch.
Flexible by design: Swap the protein, change up the vegetables, or adjust the spice level. These recipes are templates as much as they are dinners.
Weeknight Takeout vs. These Homemade Dinners
| Per Serving | Weeknight Takeout | These Dinners (avg) | Difference |
|---|---|---|---|
| Cost | about $15 | about $4 | Far cheaper |
| Sodium | about 1400mg | about 600mg | Lower |
| Protein | about 20g | about 26g | More |
| Made fresh | no | yes | You control it |
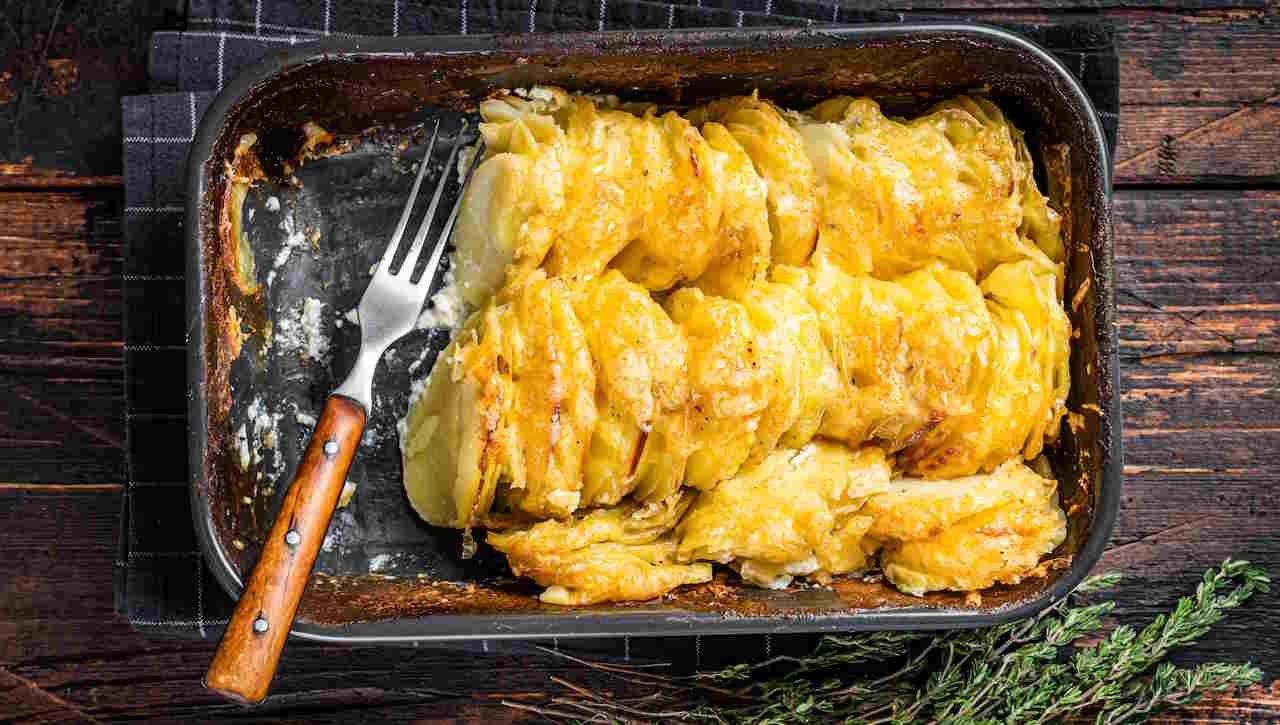
1. One-Pan Lemon Chicken with Veggies

Bright lemon, tender chicken, and vegetables all roast on a single pan, so dinner and cleanup are both done fast. The recipe card below has the full method.
One-Pan Lemon Chicken with Veggies
Ingredients
Equipment
Method
- Marinate the Chicken
- Whisk together buttermilk, lemon juice, lemon zest, honey, Dijon mustard, garlic, salt, and pepper in a large bowl.
- Add chicken breasts and turn to coat. Marinate for at least 15 minutes (or up to 2 hours in the fridge for more flavor).
- Prepare the Veggies
- While the chicken marinates, preheat your oven to 425°F (220°C).
- On a large rimmed baking sheet, toss carrots, broccolini, shallot, cherry tomatoes, green beans, and bell pepper with 1 tablespoon olive oil, smoked paprika, and oregano. Season with salt and pepper.
- Assemble and Bake
- Push the veggies to the sides of the pan and place the marinated chicken breasts in the center. Drizzle chicken with the remaining tablespoon of olive oil.
- Pour any extra marinade over the chicken and veggies for extra flavor.
- Roast for 20–25 minutes, or until the chicken is cooked through (internal temperature should reach 165°F/74°C) and veggies are tender and starting to caramelize.
- Serve
- Garnish with chopped fresh parsley or basil and lemon wedges.
- Serve immediately, spooning pan juices over the chicken and veggies.
Nutrition
Notes
Each serving of this dish contains approximately 431 calories, with a significant amount of protein at 27 grams per serving. The combination of lemon juice, fresh herbs, and fresh veggies like cherry tomatoes, green beans, and bell peppers makes this meal delicious and nutritious. It’s a fantastic, easy lunch or dinner option that keeps you satisfied and healthy.
Tried this recipe?
Let us know how it was!2. Greek Yogurt Marinated Chicken

A quick yogurt marinade keeps this chicken juicy and tender, with 33g of protein per serving. Grill it or bake it, whatever your night allows. Here is the complete recipe.
Greek Yogurt Marinated Chicken
Ingredients
Equipment
Method
- Marinate the Chicken
- Whisk together Greek yogurt, olive oil, lemon juice, lemon zest, garlic, oregano, cumin, paprika, salt, pepper, and chili flakes in a large bowl.
- Add the chicken and toss to coat evenly. Cover and marinate in the refrigerator for at least 30 minutes (up to 8 hours for best flavor).
- Choose Your Cooking Method
- Air Fryer:
- Preheat air fryer to 375°F (190°C).
- Remove excess marinade from chicken and place in the air fryer basket.
- Cook for 12–15 minutes, flipping halfway, until chicken is golden and cooked through (internal temp 165°F/74°C).
- Grill:
- Preheat grill to medium-high heat. Oil the grates.
- Grill chicken 5–7 minutes per side, until nicely charred and cooked through.
- Oven:
- Preheat oven to 425°F (220°C).
- Place chicken on a lined baking sheet. Bake for 18–22 minutes, until cooked through and slightly browned.
- Serve
- Let the chicken rest for a few minutes, then slice.
- Garnish with fresh parsley or dill.
- Serve with crunchy veggies, a Greek salad, or inside pita bread with cucumber and tomato.
Nutrition
Notes
Double the marinade and use it as a sauce or dip for extra flavor! Enjoy this Greek Yogurt-Marinated Chicken as a new staple in your healthy dinner rotation! After marinating, the chicken can be cooked in an air fryer, on a grill, or in the oven, making it versatile and convenient. Pair it with some crunchy veggies or a fresh salad for a complete meal that’s delicious and nutritious, making it an excellent option for lunch and dinner.
Tried this recipe?
Let us know how it was!3. Instant Pot Beef Stew

All the slow-simmered comfort of classic beef stew in a fraction of the time, thanks to the pressure cooker. The full recipe card follows.


Instant Pot Beef Stew
Ingredients
Equipment
Method
- Brown the Beef
- Set the Instant Pot to the sauté function and add olive oil.
- Season beef cubes with salt, pepper, and Italian seasoning.
- Add beef to the pot in batches and brown on all sides (about 2–3 minutes per batch). Remove and set aside.
- Sauté Aromatics
- Add chopped onion and garlic to the pot. Sauté for 2–3 minutes until softened.
- Pour in a splash of beef broth and scrape up any browned bits from the bottom with a wooden spoon (this prevents the burn warning).
- Add Remaining Ingredients
- Return the beef to the pot. Add carrots, potatoes, celery (if using), Worcestershire sauce, tomato paste or sauce, and the rest of the beef broth. Stir to combine.
- Do not add cornstarch or peas yet.
- Pressure Cook
- Lock the lid and set the steam valve to “sealing.”
- Cook on high pressure for 35 minutes.
- Allow the pressure to release naturally for 10 minutes, then do a quick release for any remaining pressure.
- Thicken the Stew
- Mix cornstarch with cold water in a small bowl to make a slurry.
- Turn the Instant Pot to sauté mode. Stir the slurry into the stew and simmer for 2–3 minutes until thickened.
- Stir in peas, if using, and cook for 1–2 minutes until heated through.
- Serve
- Taste and adjust seasoning as needed.
- Ladle into bowls and garnish with chopped parsley.
- Serve hot with crusty bread or a green salad for a complete meal.
Nutrition
Notes
Tried this recipe?
Let us know how it was!4. Creamy Broccoli and White Bean Soup

Blended white beans make this broccoli soup velvety without any cream, and at 190 calories it is the lightest dinner in the lineup. Here is the complete recipe.

Creamy Broccoli and White Bean Soup
Ingredients
Equipment
Method
- Sauté Aromatics
- Heat olive oil in a large pot over medium heat.
- Add onion and cook until soft, about 4 minutes.
- Stir in garlic and cook for 1 minute until fragrant.
- Add Broccoli and Beans
- Add chopped broccoli (florets and stems), cannellini beans, thyme, salt, pepper, and red pepper flakes (if using).
- Pour in the vegetable broth and bring to a boil.
- Simmer
- Reduce heat, cover, and simmer for 12–15 minutes until broccoli is very tender.
- Blend the Soup
- Use an immersion blender to puree the soup directly in the pot until smooth and creamy.
- Alternatively, carefully transfer the soup in batches to a blender and blend until smooth. Return to the pot.
- Finish and Serve
- Stir in lemon juice and nutritional yeast or Parmesan, if using. Adjust seasoning to taste.
- Ladle into bowls and garnish with fresh parsley or chives.
Nutrition
Notes
Freezer & Storage Tips
- To freeze: Cool soup completely, transfer to airtight containers, and freeze for up to 1 month.
- To reheat: Thaw overnight in the fridge and gently reheat on the stove, adding a splash of broth or water as needed.
Tried this recipe?
Let us know how it was!5. Roasted Cauliflower Tacos

Crispy roasted cauliflower, a zingy Peruvian green sauce, and quick pickled red onions make these the standout meatless dinner of the bunch. The recipe card below has the full method.


Roasted Cauliflower Tacos with Peruvian Green Sauce and Pickled Red Onions
Ingredients
Equipment
Method
- Roast the Cauliflower
- Preheat oven to 425°F (220°C). Line a baking sheet with parchment paper.
- In a large bowl, toss cauliflower florets with olive oil, smoked paprika, chili powder (or tajin), cumin, onion powder, garlic powder, and salt until well coated.
- Spread evenly on the baking sheet. Roast for 25–30 minutes, tossing halfway, until golden and crisp at the edges.
- Squeeze fresh lime juice over the roasted cauliflower after baking for extra brightness.
- Make the Pickled Red Onions
- In a saucepan, combine vinegar, water, sugar, and salt. Bring to a boil, stirring until sugar dissolves.
- Place sliced onions and bay leaves in a heat-safe bowl or jar. Pour hot pickling liquid over onions. Let cool, then refrigerate for at least 30 minutes (overnight for best flavor).
- Onions will keep in the fridge for up to 2 weeks.
- Prepare the Peruvian Green Sauce
- In a food processor or blender, combine cilantro, jalapeños, garlic, basil, cumin, chili paste (if using), cheese (if using), lime juice, and olive oil. Blend until smooth and creamy—season with salt to taste.
- Adjust lime juice or oil for desired consistency.
- Assemble the Tacos
- Warm tortillas in a dry skillet or oven.
- Fill each tortilla with a generous scoop of roasted cauliflower.
- Drizzle with Peruvian green sauce.
- Top with pickled red onions and fresh cilantro.
- Serve with lime wedges on the side.
Nutrition
Notes
Tips & Variations
- Add a simple cabbage slaw or avocado slices for extra crunch and creaminess.
- For a gluten-free option, use corn tortillas.
- For extra heat, leave some jalapeño seeds in the green sauce.
Tried this recipe?
Let us know how it was!6. Sheet-Pan Crispy Ramen

Ramen noodles crisp up on a sheet pan with vegetables and protein for a fun, hands-off take on takeout. Here is the complete recipe.


Sheet-Pan Crispy Ramen
Ingredients
Equipment
Method
- Marinate the Chicken
- Whisk together soy sauce, honey, sesame oil, garlic, ginger, and black pepper in a bowl.
- Add chicken thighs and toss to coat. Let marinate for at least 10 minutes (up to 1 hour for more flavor).
- Prepare the Ramen and Veggies
- Preheat oven to 425°F (220°C). Line a large sheet pan with parchment paper or foil for easy cleanup.
- Break ramen noodles into rough pieces and spread evenly on the sheet pan.
- Drizzle noodles with one tablespoon olive oil and toss gently to coat.
- Arrange bell pepper, snap peas, broccoli, carrots, and red onion over the noodles. Drizzle with remaining olive oil and toss lightly.
- Assemble and Bake
- Remove chicken from marinade (reserve excess marinade).
- Nestle chicken thighs skin-side up among the noodles and veggies on the sheet pan.
- Brush chicken with a little extra marinade.
- Bake for 25–30 minutes, until the chicken is cooked through (internal temperature 165°F/74°C) and the skin is crispy. Stir the veggies and noodles gently halfway through for even crisping.
- For extra crispy noodles, broil for 2–3 minutes at the end, watching closely.
- Finish and Serve
- Garnish with green onions and sesame seeds.
- Serve immediately, ensuring everyone gets some crispy noodles, juicy chicken, and plenty of veggies.
Nutrition
Notes
Tips & Variations
- Vegetarian: Swap chicken for tofu or tempeh and use extra veggies.
- Spicy: Add a drizzle of sriracha or chili oil before serving.
- Extra Flavor: Sprinkle with fresh cilantro or a squeeze of lime.
Tried this recipe?
Let us know how it was!7. BBQ Sheet-Pan Chicken

Saucy BBQ chicken and vegetables roast together on one pan, with 34g of protein and barely any cleanup. The full recipe card follows.

BBQ Sheet-Pan Chicken
Ingredients
Equipment
Method
- Instructions
- Marinate the Chicken
- Combine chicken thighs, barbecue sauce, olive oil, smoked paprika, garlic powder, salt, and pepper in a large bowl. Toss to coat thoroughly.
- Let marinate for at least 15 minutes (up to 2 hours in the fridge for deeper flavor).
- Prep the Vegetables
- Preheat oven to 425°F (220°C). Line a large sheet pan with parchment paper or foil for easy cleanup.
- In a separate bowl, toss potatoes, bell peppers, onion, and broccoli with olive oil, salt, and pepper.
- Assemble the Sheet Pan
- Arrange the marinated chicken thighs on the sheet pan, skin-side up.
- Scatter the vegetables evenly around the chicken.
- Brush a little extra BBQ sauce over the chicken for extra glaze.
- Bake
- Roast for 30–35 minutes, or until the chicken is cooked through (internal temp 165°F/74°C) and the vegetables are tender and golden.
- For extra caramelization, broil for 2–3 minutes at the end, watching closely.
- Serve
- Garnish with fresh parsley or chives and serve with lemon wedges if desired.
- Enjoy hot, ensuring each plate gets a mix of juicy BBQ chicken and roasted veggies.
Nutrition
Notes
Tips & Variations
- Vegetarian: Substitute chicken with thick tofu or tempeh slices, and use BBQ sauce as a glaze.
- Spicy: Add a pinch of cayenne or hot sauce to the BBQ sauce.
- Extra Veggies: Add zucchini, corn, or mushrooms for more variety.
- : Add natural sweetness and pair well with smoky BBQ flavors
- : Bring vibrant color and a sweet, slightly tangy flavor
- : Roasts to a mellow, sweet flavor that complements BBQ sauce
- : Provides a hearty, slightly crispy texture when roasted.
- : Their earthiness and crisp edges work well with BBQ chicken
- : Creamy and filling, they absorb BBQ flavors beautifully
- : Stay crisp-tender and add freshness to the pan
- : Roasts to a nutty, slightly sweet flavor
- : Mild flavor and quick roasting time; add moisture and color
- : Sweeten as they roast and add a pleasant bite
- : Roasts quickly and pairs well with BBQ sauce
- : For a more unique twist, these root vegetables add depth and sweetness
- : Combine several vegetables for a colorful, nutrient-rich meal
- : Chop vegetables to similar sizes to ensure even roasting
- : Add potatoes, sweet potatoes, or carrots to the pan first, as they take longer to cook, then add quicker-cooking veggies later
Tried this recipe?
Let us know how it was!8. Tuscan Chicken Pasta

A creamy sun-dried tomato and spinach sauce coats chicken and pasta for a restaurant-style dinner that stays in one pan. Here is the complete recipe.
Tuscan Chicken Pasta
Ingredients
Equipment
Method
- Cook the Pasta
- Bring a large pot of salted water to a boil. Cook pasta according to package directions until al dente. Drain and set aside.
- Cook the Chicken
- While the pasta cooks, season chicken pieces with Italian seasoning, garlic powder, salt, and pepper.
- In a large skillet, heat one tablespoon olive oil over medium-high heat.
- Add chicken and cook until golden and cooked through, about 5–6 minutes. Remove chicken and set aside.
- Make the Creamy Sauce
- In the same skillet, add remaining olive oil and minced garlic. Sauté for 1 minute until fragrant.
- Add sun-dried tomatoes and cook for another minute.
- Pour in chicken broth and scrape up any browned bits from the pan.
- Reduce heat to medium-low, add heavy cream, and bring to a gentle simmer.
- Stir in Parmesan cheese until melted and smooth.
- Add spinach and cook until just wilted.
- Combine and Serve
- Return cooked chicken to the skillet, along with drained pasta. Toss everything together until well coated in the creamy sauce.
- Adjust seasoning with salt, pepper, and red pepper flakes if using.
- Serve hot, garnished with extra Parmesan and fresh basil or parsley.
Nutrition
Notes
Tips & Variations
- Lighter Option: Use half and half or whole milk instead of cream, and add extra chicken broth for a lighter sauce.
- Vegetarian: Omit chicken and add sautéed mushrooms or artichoke hearts.
- Gluten-Free: Use your favorite gluten-free pasta.
Tried this recipe?
Let us know how it was!9. Thai Green Curry

Fragrant green curry with chicken comes together fast and tastes like your favourite Thai spot, no reservation required. The recipe card below has the full method.

Thai Green Curry
Ingredients
Equipment
Method
- Sauté the Curry Paste
- Heat oil in a large pot or deep skillet over medium heat.
- Add the green curry paste and sauté for 2–3 minutes until fragrant and slightly darkened.
- Add Coconut Milk and Broth
- Pour in half the coconut milk and stir until the paste is well incorporated and the mixture is aromatic and slightly thickened.
- Add the chicken or protein of choice and cook for 2–3 minutes, stirring to coat in the curry base15.
- Simmer with Vegetables
- Add the remaining coconut milk, chicken or vegetable broth, fish sauce, sugar, and makrut lime leaves.
- Bring to a gentle simmer.
- Add bamboo shoots (or eggplant/zucchini), bell pepper, cherry tomatoes, and broccolini/green beans.
- Simmer for 7–10 minutes, or until the chicken is cooked and the vegetables are tender but vibrant.
- Finish the Curry
- Stir in Thai basil leaves and cilantro (if using). Squeeze in lime juice to taste.
- Adjust seasoning with extra fish sauce, sugar, or lime juice as needed.
- Serve
- Ladle the curry over steamed jasmine rice or rice noodles.
- Garnish with extra basil, cilantro, fresh chili, and lime wedges.
Nutrition
Notes
Homemade Green Curry Paste (Optional, for the adventurous cook)
- 2 teaspoons coriander seeds
- 1 teaspoon cumin seeds
- 1 teaspoon white peppercorns
- 8–10 Thai green chilies (or serrano chilies), chopped
- 2 small shallots, chopped
- 3 cloves garlic, chopped
- 1 stalk lemongrass (bottom half only), sliced
- 1-inch piece galangal (or ginger), chopped
- Zest of 1 makrut lime (or regular lime)
- 4 cilantro roots or stems, chopped
- 2 makrut lime leaves, torn
- 1 teaspoon salt
- 1 tablespoon shrimp paste (or miso for vegan)
Tried this recipe?
Let us know how it was!
Chef Tips for Quick and Easy Dinners
Line the sheet pan: A sheet of parchment or foil means the only thing you wash after a sheet-pan dinner is the cutting board. It is the single best shortcut here.
Prep aromatics ahead: Chop onions, mince garlic, and measure spices on the weekend. With the prep done, most of these dinners come together in the time it takes the oven to preheat.
Marinate while you work: Start the yogurt marinade or curry paste in the morning so the flavour builds all day and dinner is mostly hands-off by evening.
Double the batch: Stews, soups, and curry cost almost no extra effort to double, and the leftovers turn into next-day lunches or a freezer stash for later.
Keep a pantry backbone: Canned beans, broth, pasta, rice, and a jar of curry paste mean you are always one quick shop away from several of these dinners.
A little planning is what keeps weeknight dinners fast. Here is how to store, reheat, and round out the meal.
Storage and Serving Suggestions
Refrigerator Storage: Most of these dinners keep in airtight containers for up to 4 days, and the stew, soup, and curry only taste better on day two as the flavours settle.
Freezer Storage: The beef stew, broccoli soup, and Thai green curry all freeze well for up to 3 months. Cool completely, portion into containers, and thaw overnight in the fridge before reheating.
Meal Prep Strategy: Cook a big batch of the marinated chicken or stew on Sunday and you have several lunches ready to go. For more batch-friendly ideas, see our quick soup recipes and these cozy low-carb stews.
Complete the Meal: Pair any of these with a simple green salad, rice, or crusty bread. Hungry for more one-pot dinners? Try our teriyaki beef bowls or this easy pork chop casserole.
Quick and Easy Dinner Recipes FAQs
How long does the One-Pan Lemon Chicken take to make?
You can have the one-pan lemon chicken with veggies on the table in under 40 minutes, including prep. Because everything roasts in a single pan, most of that time is hands-off.
Can I freeze the Creamy Broccoli and White Bean Soup?
Yes. The creamy broccoli and white bean soup freezes well for up to a month. Cool it completely, portion into airtight containers, and thaw in the fridge before gently reheating.
Can the Greek Yogurt Marinated Chicken be cooked in the oven?
Absolutely. The Greek yogurt marinated chicken is versatile, so you can grill it or bake it in the oven until cooked through. The yogurt marinade keeps it juicy either way.
Which of these dinners is best for meal prep?
The beef stew, broccoli soup, marinated chicken, and Thai green curry all hold up beautifully when made ahead. Cook them a day or two early, store in portions, and reheat for fast lunches or dinners.
Want even more fast dinner inspiration? These reader favourites belong in any weeknight rotation.
You Might Also Like
A bright, low-carb chicken dinner that comes together fast.
Thirty warming, vegetable-forward dinners for the whole family.
A hands-off, gluten-free take on the takeout classic.
Fork-tender brisket in 90 minutes for a special weeknight.
Final Thoughts
With nine quick and easy dinner recipes in your back pocket, the nightly what-is-for-dinner scramble gets a whole lot easier. Lean on one pan, the Instant Pot, and a little weekend prep, and a fresh, satisfying dinner is always within reach. Pick one, give it a go, and build your own weeknight rotation from there.
Medical Disclaimer: The nutritional information provided in this article is for informational purposes only. While we strive for accuracy, individual responses to foods vary. Always consult with your healthcare provider or registered dietitian about dietary changes.