Beat the summer heat without touching the oven by whipping up revitalizing no-bake summer treats. These cool desserts offer endless possibilities, from creamy avocado chocolate mousse to vibrant watermelon pizza topped with fresh fruits. Energy balls packed with wholesome ingredients provide natural boosts, while frozen banana nice cream delivers guilt-free indulgence. Mason jar trifles and fresh berry parfaits transform simple ingredients into Instagram-worthy masterpieces. These fifteen creative recipes open up a world of sweet summer possibilities.
Key Highlights of the 15 Summer Treats
- No-bake energy balls and cookies provide quick, wholesome snacks without heating up your kitchen during summer.
- Fresh fruit-based summer treats like watermelon pizza and berry parfaits offer refreshing alternatives to baked desserts.
- Frozen summer treats, including nice banana cream and layered popsicles, deliver cooling satisfaction without oven use.
- Overnight oats and smoothie bowls create effortless breakfast options while keeping the kitchen cool.
- Mason jar desserts and avocado chocolate mousse provide elegant, make-ahead treats for summer entertaining.

Fresh Berry Yogurt Parfaits
Layers of creamy goodness await in these delightful Fresh Berry Yogurt Parfaits – a summertime breakfast that feels more like dessert.
These no-bake summer treats combine the fresh berry benefits of antioxidants and vitamins with protein-rich Greek yogurt, creating a guilt-free indulgence perfect for those scorching days. The parfait presentation transforms a simple breakfast into an Instagram-worthy masterpiece, with vibrant layers of red strawberries, plump blueberries, and golden honey drizzles.
Layer upon layer of nutritious indulgence, where fresh berries meet creamy Greek yogurt in a symphony of summer flavors.
For the best results, select berries at peak ripeness and layer them between spoonfuls of chilled yogurt. A sprinkle of granola adds just the right amount of crunch.
The beauty of parfaits lies in their versatility – swap in seasonal fruits or experiment with different yogurt flavors for endless variations.
Who needs a fancy pastry shop when paradise comes in a glass?
No-Bake Energy Balls
Rolling up wholesome ingredients into bite-sized summer treats, no-bake energy balls offer the same grab-and-go convenience as parfaits but in a more portable package.
These sweet spheres of goodness combine nutrient benefits from powerhouse ingredients like oats, nuts, and dried fruits into delightful morsels customized to any taste preference.
Perfect for busy summer days, these little dynamos provide natural energy boosts without the crash of processed snacks.
The combination of healthy fats, protein, and complex carbohydrates keeps hunger at bay while fueling outdoor adventures.
The best part? They’re incredibly forgiving to make.
Toss the ingredients in a food processor, roll them into balls, and refrigerate.
No precise measurements are needed – just trust your instincts and adjust until the mixture holds together.
Using a powerful food processor like the Ninja Professional Plus with its 850W motor ensures your ingredients blend smoothly and consistently every time.
Frozen Banana Nice Cream
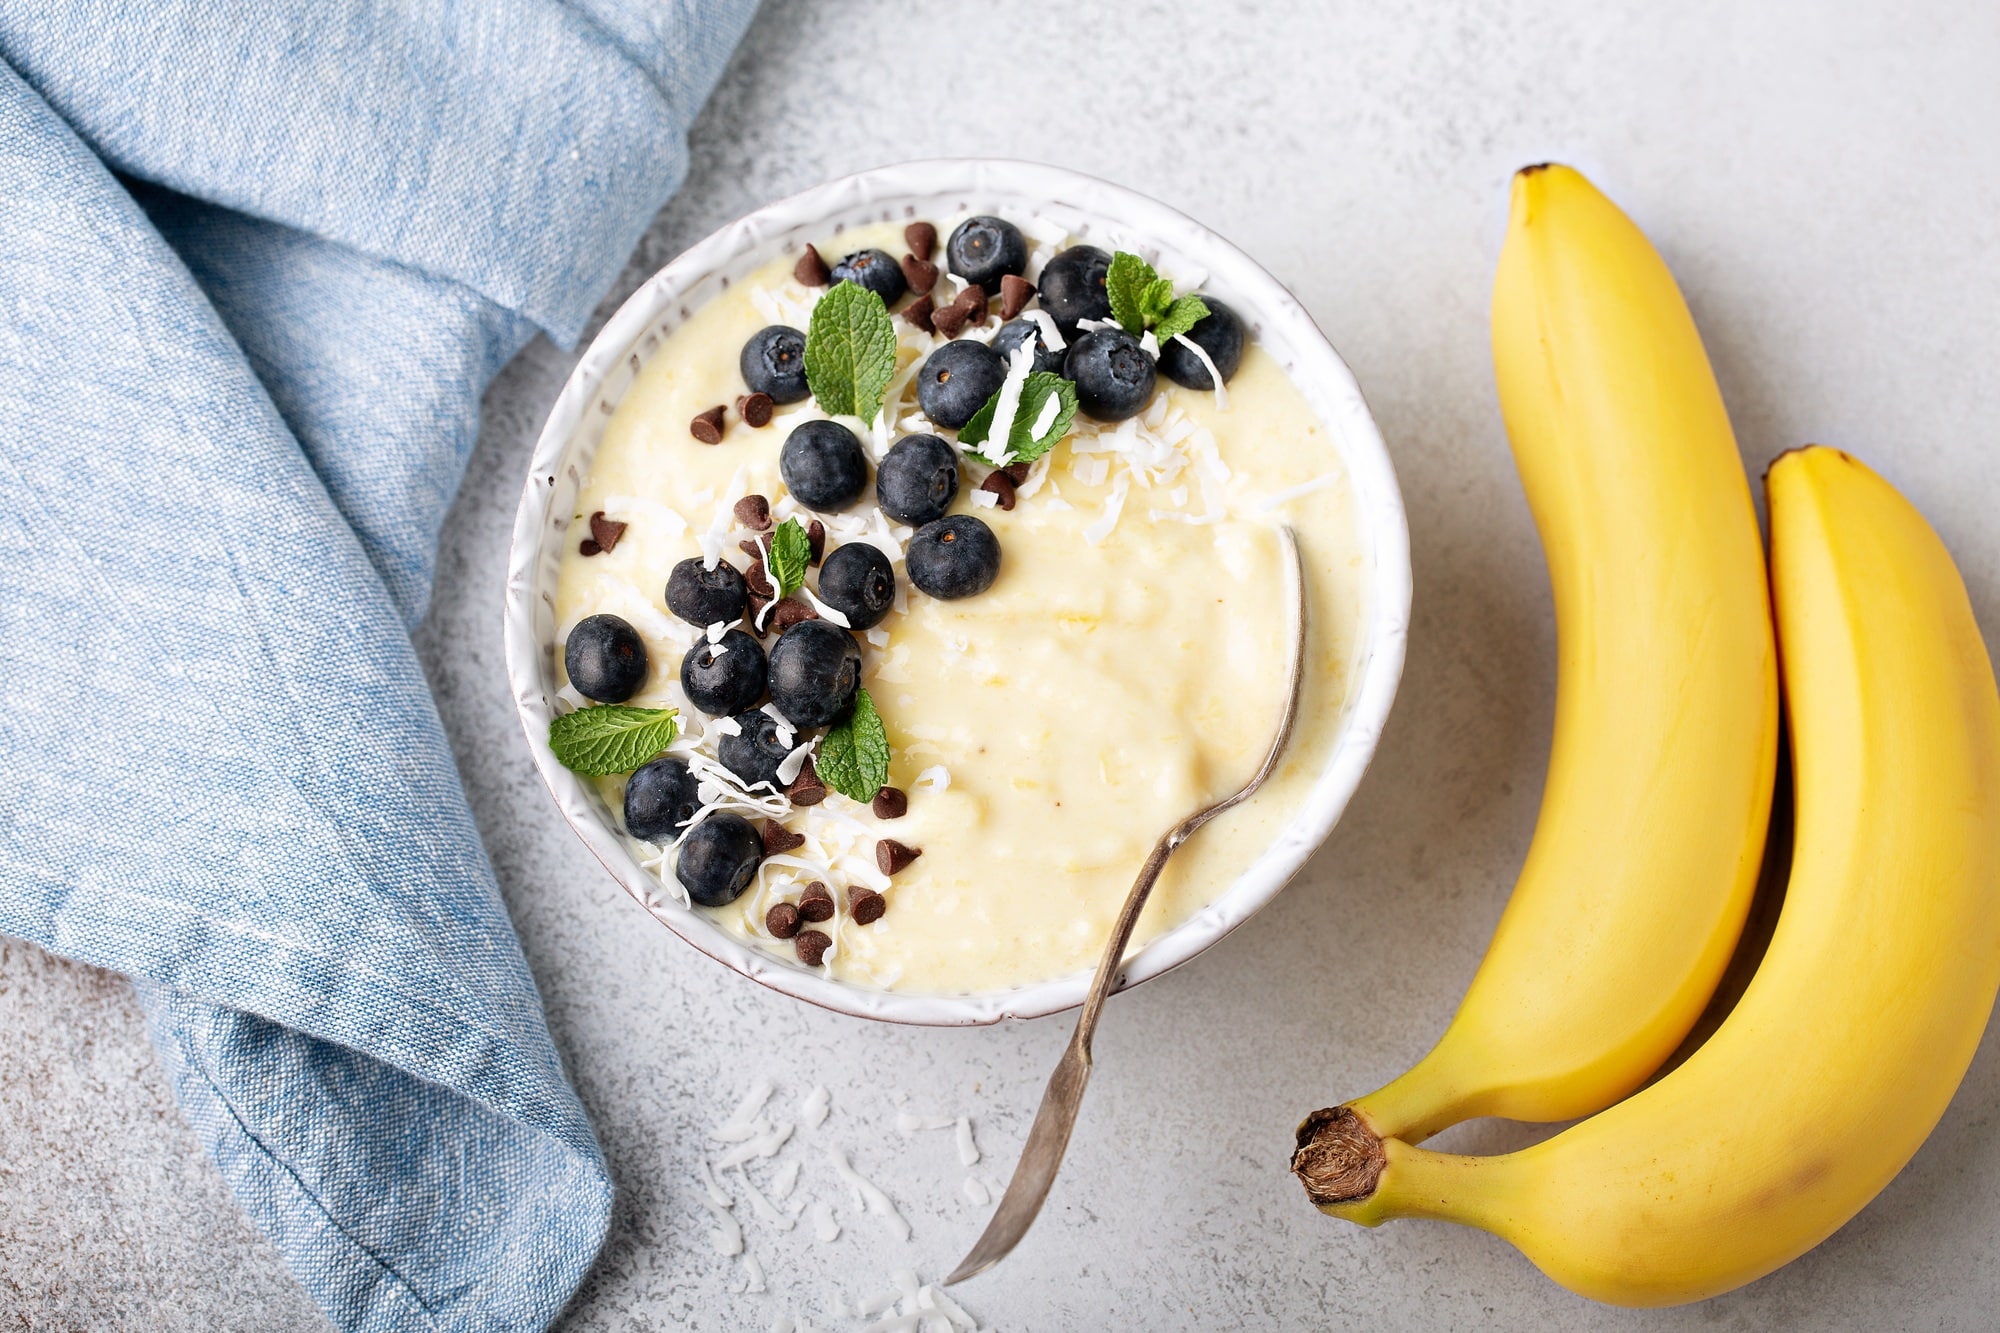
Frozen banana nice cream has become a go-to summer treat for health-conscious dessert lovers seeking a creamy alternative to traditional ice cream.
With just a few quick prep tips, like pre-slicing and freezing ripe bananas until solid, anyone can whip up this revitalizing treat in minutes using a food processor or blender.
Frozen banana nice cream is a delicious, dairy-free, and naturally sweet treat that’s as easy to make as it is healthy. Here’s how to create your own creamy, customizable nice cream in minutes!
Ingredients
- 2–3 ripe bananas
- Optional mix-ins (choose your favorites!):
- 1–2 tablespoons cocoa powder (for chocolate flavor)
- 1 teaspoon vanilla extract
- 1–2 tablespoons nut butter (peanut, almond, or cashew)
- ½ cup fresh or frozen berries
- A few fresh mint leaves
- Pinch of cinnamon or sea salt
- Mini chocolate chips or chopped nuts for topping
Instructions
1. Prep the Bananas
- Peel the bananas and slice them into coins.
- Place the slices in a single layer on a baking sheet or plate lined with parchment paper.
- Freeze for at least 2 hours, or until solid (overnight is best).
2. Blend the Nice Cream
- Add the frozen banana slices to a food processor or high-speed blender.
- Pulse or blend until the bananas break down into small pieces, then scrape down the sides as needed.
- Continue blending until the mixture becomes creamy and smooth, like soft-serve ice cream.
- Add any mix-ins (cocoa powder, vanilla, nut butter, berries, mint, etc.) and blend until fully incorporated.
3. Serve and Enjoy
- Scoop the nice cream into bowls.
- Add your favorite toppings (chocolate chips, nuts, extra berries, etc.).
- Serve immediately for a soft-serve texture, or transfer to a container and freeze for 1–2 hours for a firmer scoopable consistency.
The possibilities for flavor mix-ins are endless – from classic additions like cocoa powder and vanilla to creative combinations featuring nut butter, fresh berries, or mint leaves.
Quick Prep Tips
Making homemade “nice cream” from frozen bananas has become a summertime sensation, delighting both health-conscious families and dessert lovers alike. With quick kitchen hacks, anyone can master this frozen treat in minutes.
The key to perfect nice cream lies in preparation. Bananas should be sliced and frozen when spotted with brown flecks – that’s when they’re sweetest. Store them in airtight containers or freezer bags for up to three months.
Minimal ingredient swaps can elevate the experience for those watching their sugar intake. For example, you can replace honey with monk fruit sweetener or add a splash of vanilla extract instead.
Natural flavor boosters like cinnamon or cocoa powder can transform the basic recipe into something extraordinary.
Pro tip: Keep frozen fruit chunks on hand for instant flavor variations.
Flavor Mix-In Ideas
Why settle for plain banana nice cream when a world of creative mix-ins awaits? The beauty of this frozen treat lies in its endless customization possibilities, from seasonal flavors to unexpected pairings that awaken the taste buds.
Classic combinations like dark chocolate chips and crushed almonds never disappoint. For adventurous people, try mixing fresh lavender buds with wild blueberries or candied ginger with toasted coconut flakes.
Summer’s bounty offers perfect mix-in opportunities. Fresh peach chunks and a sprinkle of cinnamon create a cobbler-inspired delight. Mint leaves and cacao nibs deliver a revitalizing chocolate-mint experience without artificial additives.
The key is experimenting with textures. Pair something crunchy (nuts, seeds, or granola) with something chewy (dried fruit or date pieces) for an exciting contrast in every bite.
Watermelon Pizza With Fresh Fruits
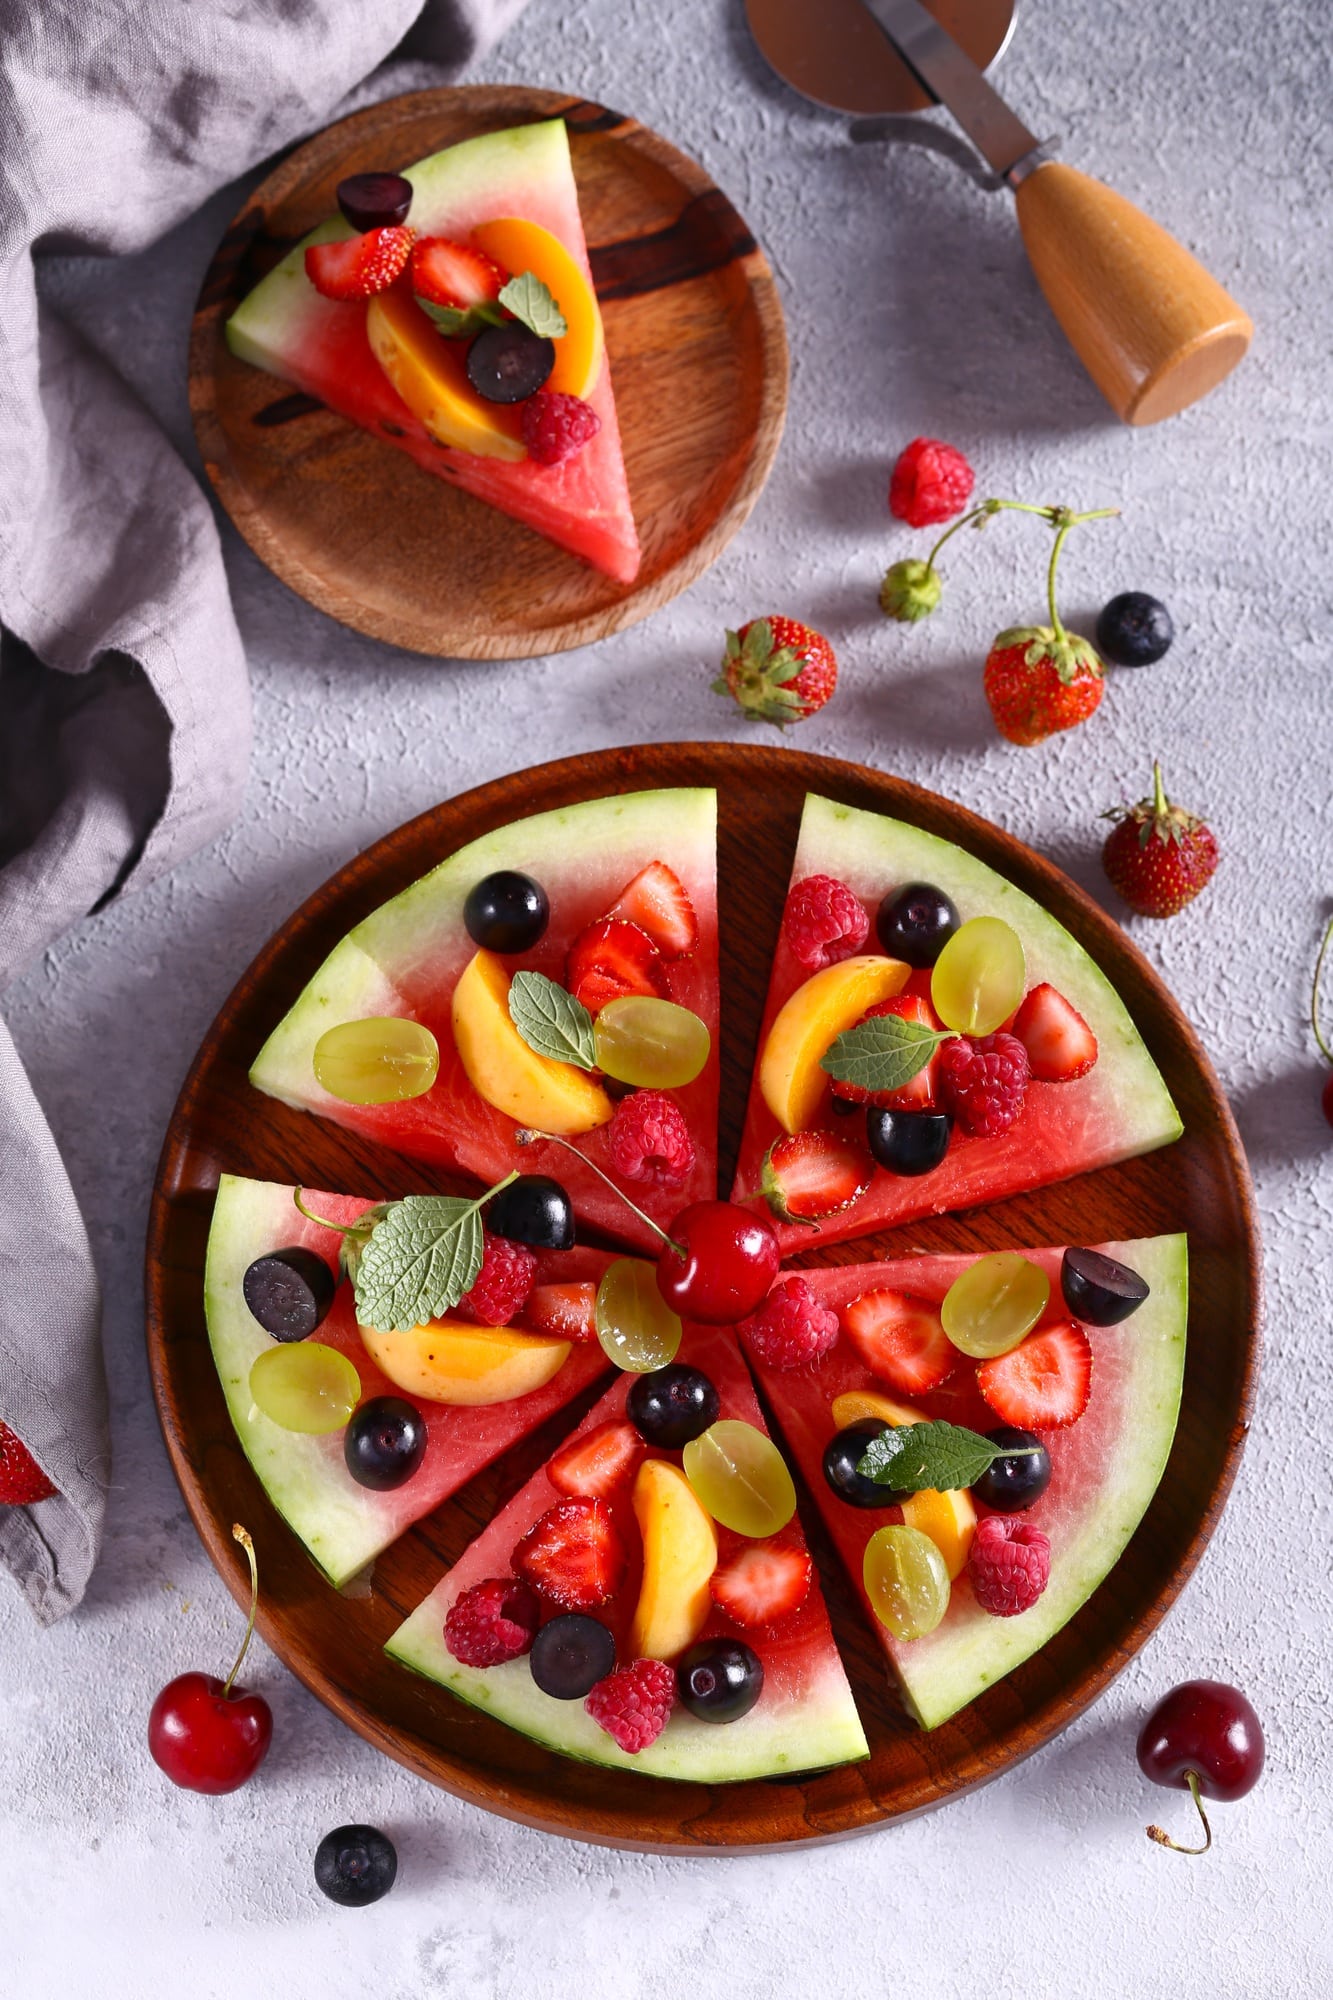
Arranging a watermelon pizza takes just minutes and offers endless creative possibilities for a revitalizing summer treat.
The colorful base begins with a thick round slice of watermelon, the perfect foundation for an array of fresh fruit toppings.
From berries and kiwi to mint leaves and a drizzle of honey, this no-bake dessert transforms ordinary fruit into an Instagram-worthy masterpiece that kids and adults alike can’t resist.
Quick Assembly Steps
The perfect watermelon pizza comes together in just minutes with simple assembly steps.
Begin by slicing a fresh watermelon into a round, pizza-like base about 1 inch thick. Pat the surface gently with paper towels to remove excess moisture.
The toppings are entirely customizable for easy ingredient swaps. Traditional choices include berries, kiwi, and grapes, but adventurous eaters might prefer tropical fruits like mango or passion fruit. A drizzle of honey or yogurt acts as the “sauce.”
Minimal cleanup tips: Prepare all fruits on a single cutting board and slice them over a bowl to catch juices. Line the workspace with parchment paper to collect any stray pieces.
The finished creation can be served immediately or chilled for up to two hours – if it lasts that long!
Sweet Topping Ideas
Countless sweet topping combinations transform ordinary watermelon pizza into an eye-catching masterpiece. Creative sweeteners and unique textures elevate this invigorating treat to new heights, making it perfect for those sultry summer afternoons.
| Fresh Toppings | Sweet Drizzles |
|---|---|
| Berries Mix | Honey |
| Kiwi Slices | Maple Syrup |
| Coconut Flakes | Chocolate |
| Mint Leaves | Yogurt |
| Pomegranate Seeds | Berry Coulis |
The beauty of watermelon pizza lies in its versatility. Health-conscious individuals can stick to fresh fruits and a light honey drizzle, while those craving indulgence might opt for chocolate drizzles and coconut flakes.
A sprinkle of fresh mint leaves ties all the ingredients together for an extra burst of summer flavor while adding an unexpected pop of color.
Chilled Mango Chia Pudding
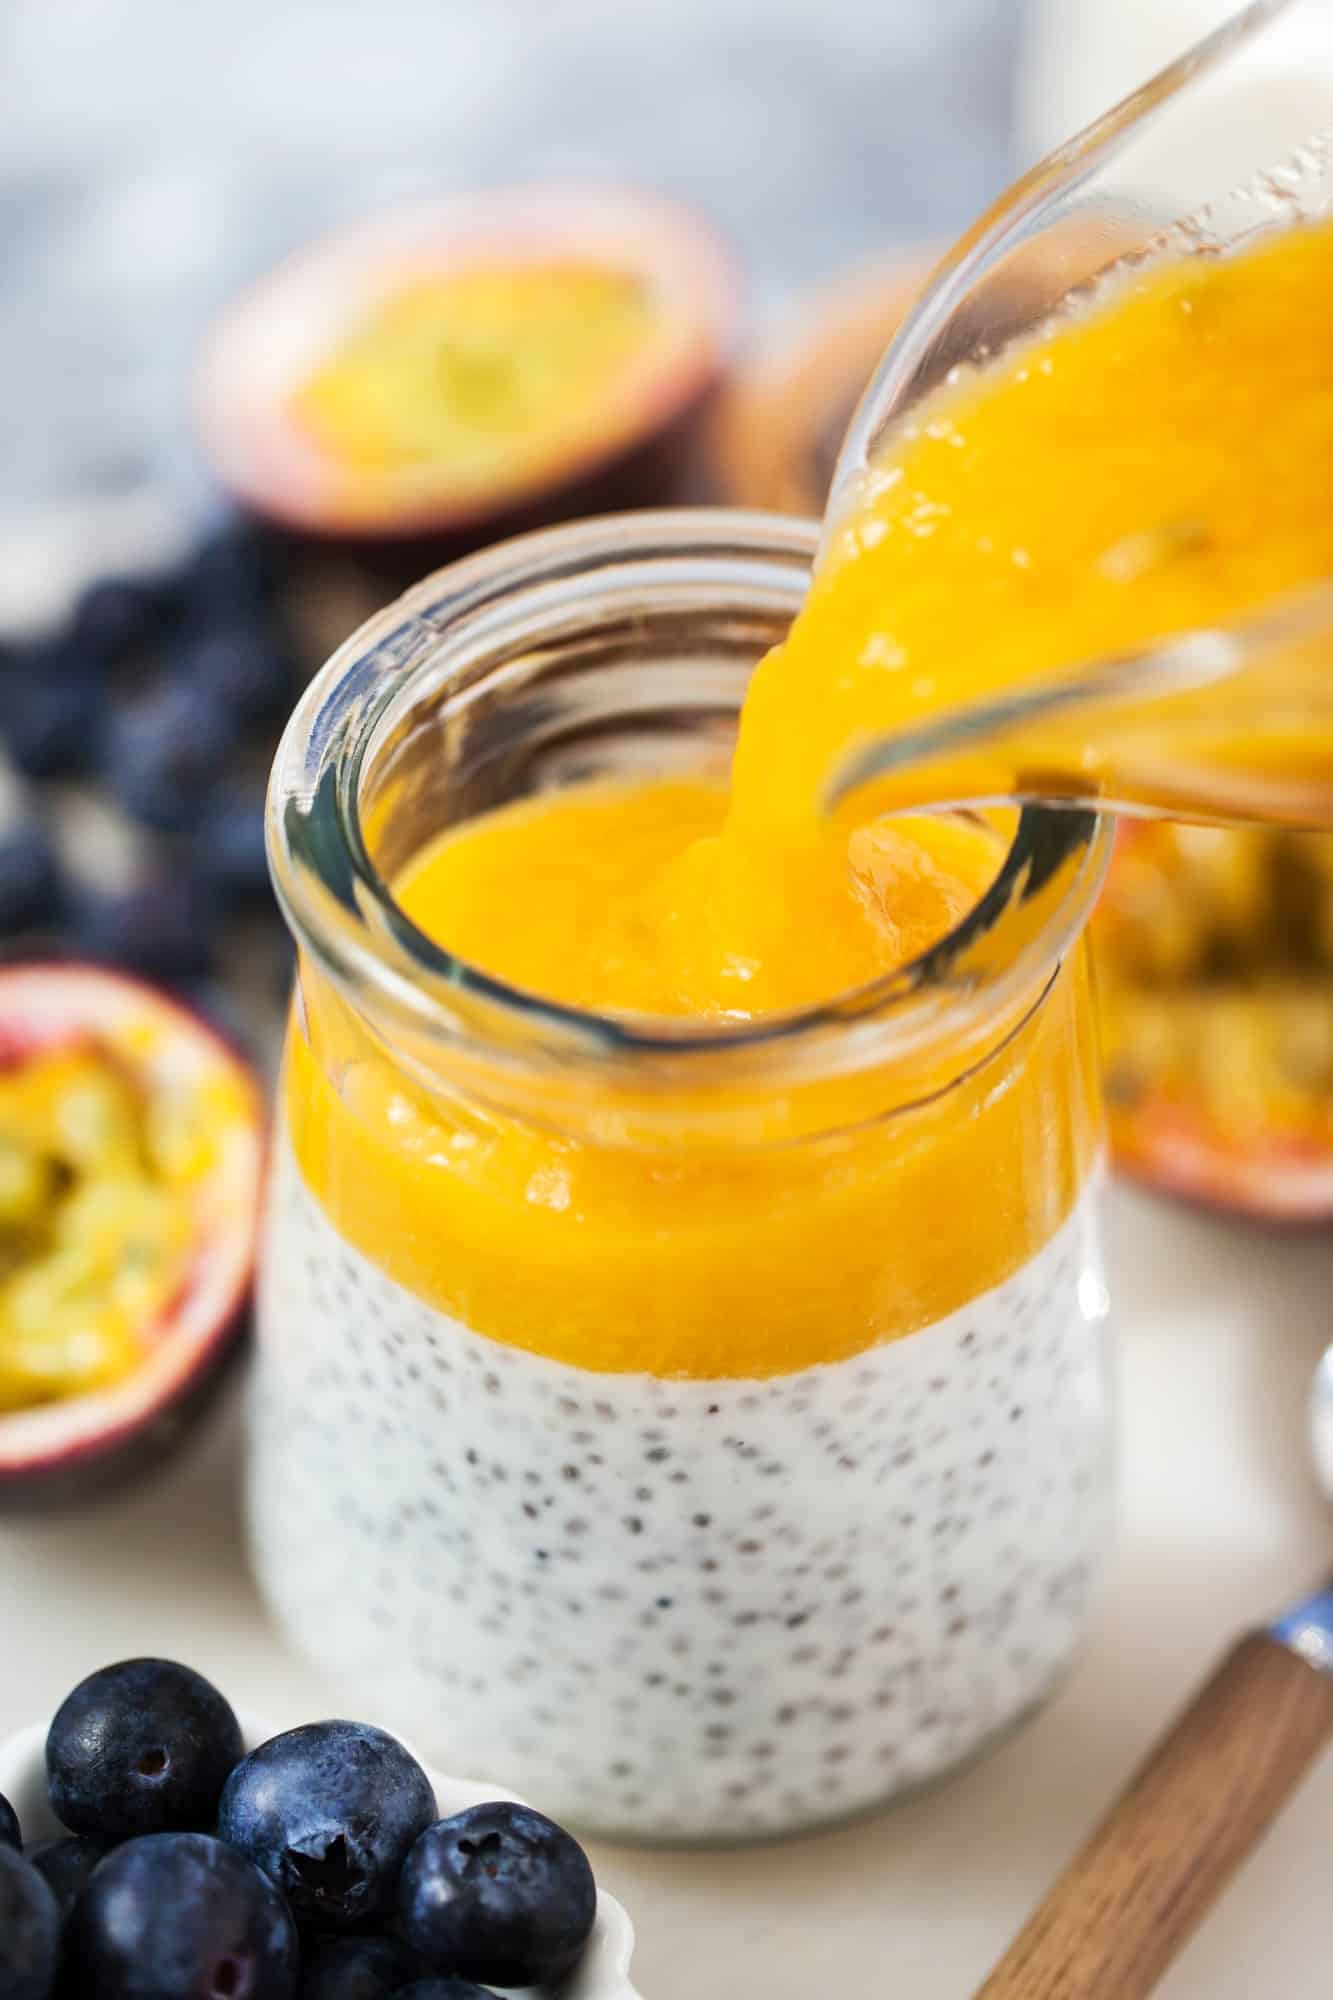
Delightful summer days call for rejuvenating treats that combine both nutrition and indulgence, making chilled mango chia pudding a perfect choice for health-conscious dessert lovers.
This invigorating dessert packs a powerful punch of mango benefits, including immune-boosting vitamins and natural sweetness that satisfies cravings without guilt.
The magic happens when chia seeds meet creamy coconut milk, creating a luxurious, filling, nutritious pudding.
Chia Nutrition stands out with omega-3 fatty acids and fiber, while the seeds’ unique gel-like texture transforms into a smooth, custard-like consistency overnight.
Topped with fresh mango chunks and a sprinkle of toasted coconut, this no-bake summer treat will bring tropical vibes to any summer gathering.
Ingredients
- For the Pudding:
- 1 cup ripe mango, diced (plus extra for topping)
- 1 cup coconut milk (full-fat for creaminess, or light for a lighter option)
- 2–3 tablespoons pure maple syrup or honey (to taste)
- ½ teaspoon pure vanilla extract (optional)
- ¼ cup chia seeds
- For Serving:
- Extra-diced mango
- 2–3 tablespoons toasted coconut flakes
Instructions
1. Blend the Mango Base
- Combine 1 cup diced mango, coconut milk, maple syrup or honey, and vanilla extract in a blender.
- Blend until completely smooth and creamy.
2. Mix in the Chia Seeds
- Pour the mango-coconut mixture into a bowl or jar.
- Whisk in the chia seeds until well combined.
- Let the mixture sit for 5 minutes, then whisk again to prevent clumping.
3. Chill and Set
- Cover and refrigerate for at least 4 hours, or overnight, until the pudding is thick and the chia seeds have absorbed the liquid, creating a custard-like texture.
4. Serve and Garnish
- Stir the pudding to fluff it up.
- Spoon into serving jars or bowls.
- Top generously with extra diced mango and a sprinkle of toasted coconut flakes.
Tips & Variations
- Extra Creamy: Use full-fat coconut milk for a richer pudding.
- Tropical Twist: Add a squeeze of lime juice or a few passion fruit seeds for zing.
- Layered Parfait: Alternate layers of chia pudding and diced mango for a beautiful presentation.
- Nutty Crunch: Add chopped pistachios or almonds for extra texture.
Why You’ll Love It
- Nutrient-Rich: Packed with fiber, omega-3s, and vitamins.
- No-Bake: Perfect for hot days- no oven required!
- Make-Ahead: Ideal for meal prep or summer gatherings.
- Vacation Vibes: Every bite tastes like a tropical getaway.
It’s like a vacation in a jar, minus the airport security hassles.
Mixed Fruit Popsicles
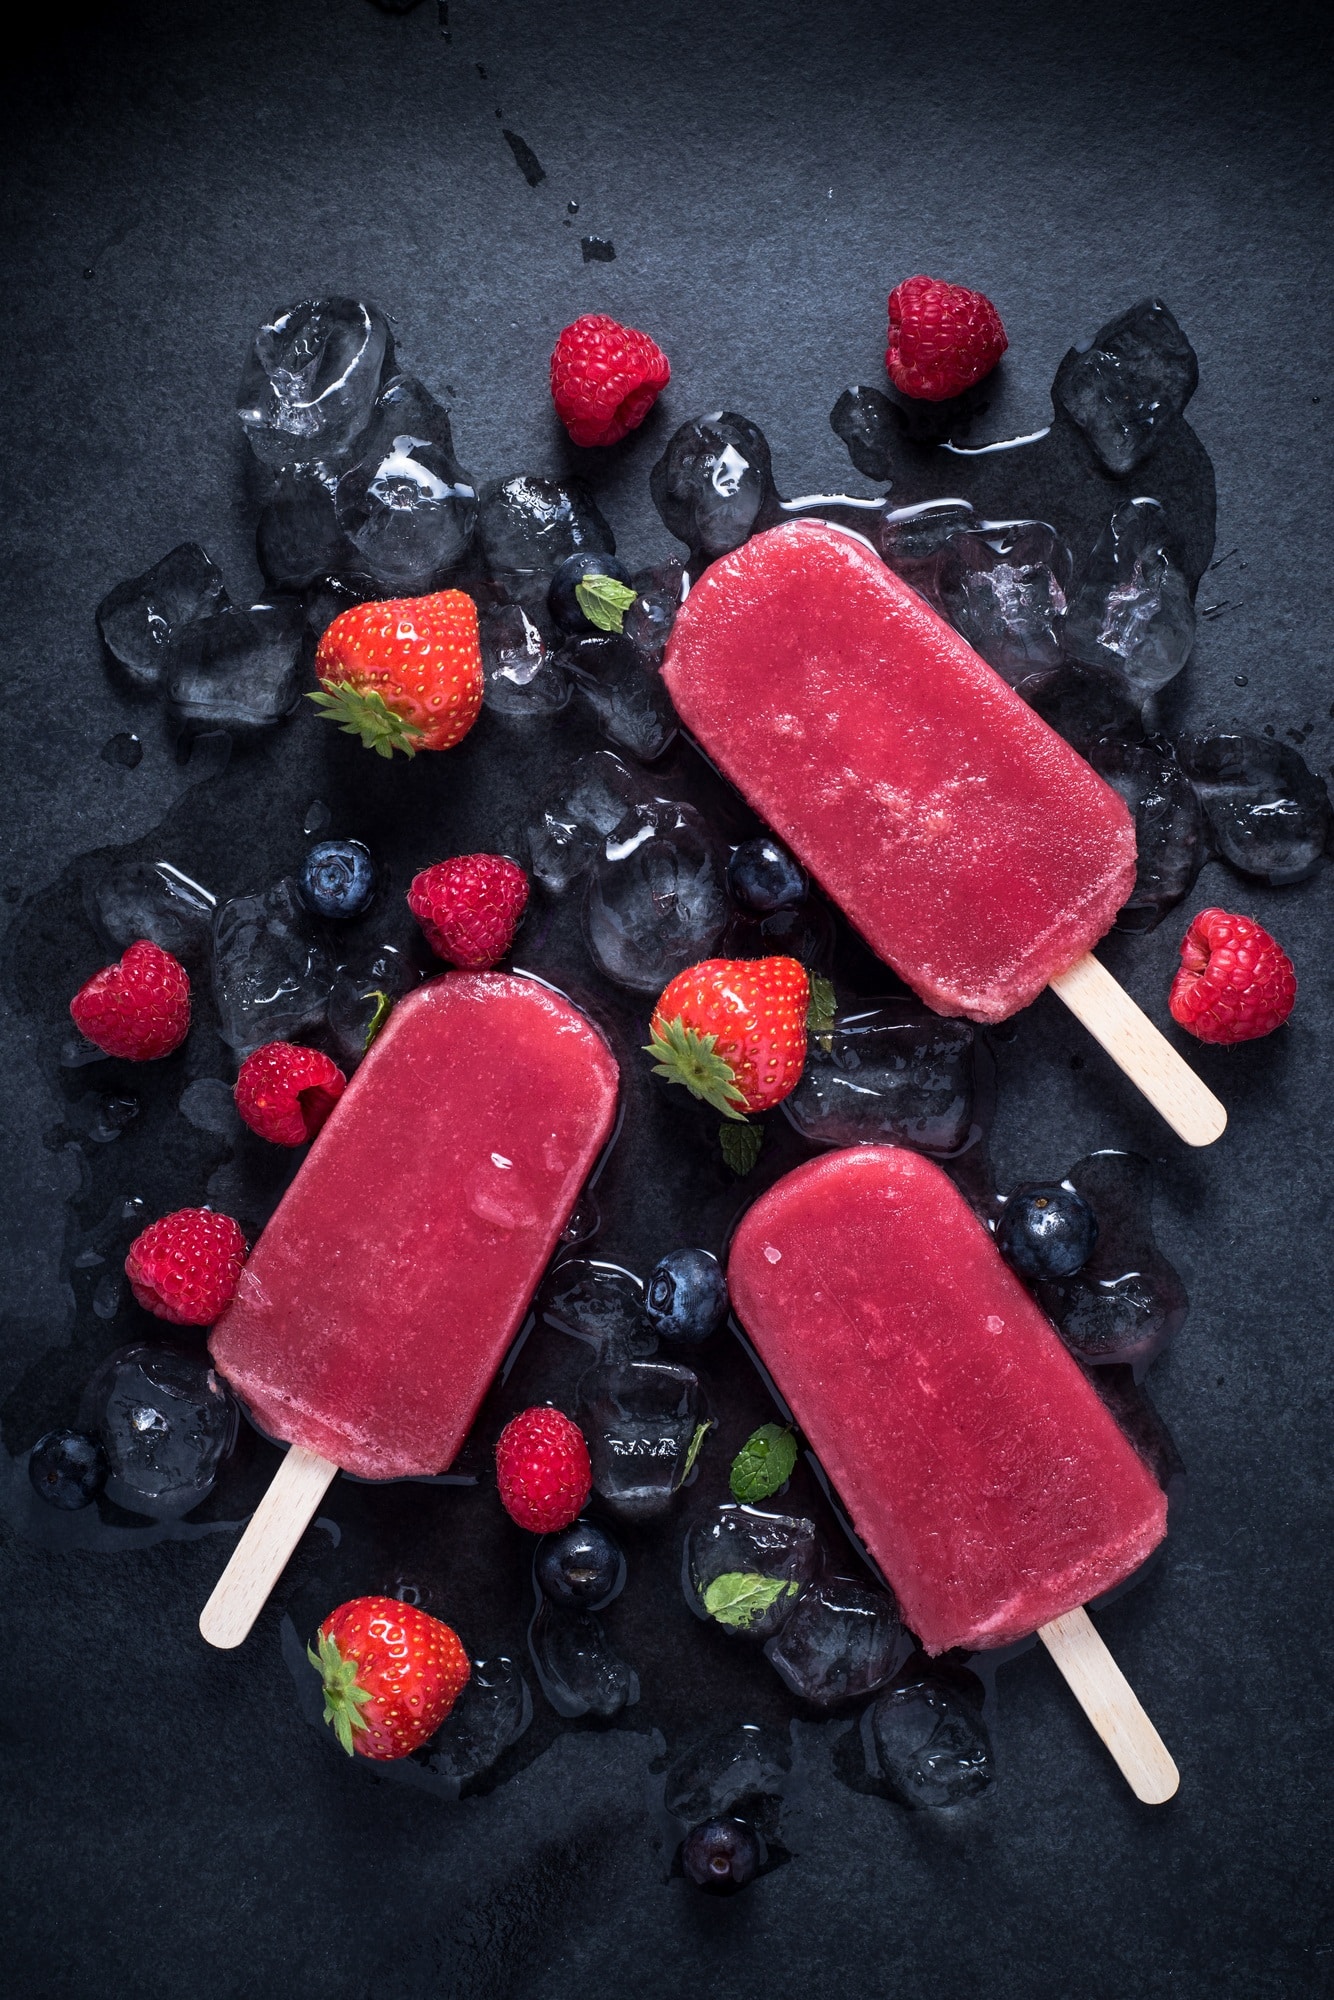
When summer temperatures soar, homemade mixed fruit popsicles offer a revitalizing escape that captures seasonal flavors in their purest form.
These vibrant treats allow creative expression through fruit layering techniques, transforming ordinary frozen desserts into edible works of art.
Transform simple frozen treats into culinary masterpieces by exploring the artistic potential of layered fruit combinations.
The magic lies in selecting perfectly ripe fruits and combining them with natural sweeteners like honey or maple syrup.
Strawberries and mangoes create stunning layers inspired by sunsets, while blueberries and peaches offer a playful contrast of colors and textures.
For best results, freeze each layer for 30 minutes before adding the next.
This patience-testing process yields Instagram-worthy popsicles with distinct, beautiful sections that make waiting worthwhile.
Raw Chocolate Coconut Bars
Raw chocolate coconut bars are the perfect guilt-free indulgence for health-conscious dessert lovers seeking revitalizing summer treats. These no-bake delights combine the antioxidant power of raw chocolate with the incredible coconut benefits that boost energy and immunity.
Ingredients
| Ingredient | Benefit |
|---|---|
| 1 cup raw cacao powder | Heart health, antioxidants |
| ½ cup coconut oil, melted | Metabolism boost |
| ⅓ cup pure maple syrup | Natural sweetness |
| 1½ cups unsweetened shredded coconut | Fiber rich |
| ¼ teaspoon sea salt | Mineral balance |
| 1 teaspoon vanilla extract (optional) | Flavor boost |
Instructions
1. Prepare the Coconut Base
- Combine the shredded coconut and a pinch of sea salt in a mixing bowl.
- Add half of the melted coconut oil (¼ cup) and half of the maple syrup (about 2½ tablespoons).
- Mix until the coconut is evenly coated and the mixture holds together when pressed.
2. Press and Chill
- Line a loaf pan or small square pan (8×8-inch or similar) with parchment paper.
- Press the coconut mixture firmly and evenly into the bottom of the pan.
- Place in the freezer while you prepare the chocolate layer.
3. Make the Raw Chocolate Layer
- In a clean bowl, whisk together the raw cacao powder, remaining melted coconut oil, remaining maple syrup, and vanilla extract (if using) until smooth and glossy.
4. Assemble the Bars
- Pour the chocolate mixture over the chilled coconut base.
- Tilt the pan gently to spread the chocolate evenly.
- Sprinkle a pinch of sea salt on top for a gourmet touch.
5. Set and Slice
- Return the pan to the freezer for at least 1 hour, or until fully set.
- Lift the bars out using the parchment paper and slice into squares or bars.
Storage
- Bars can be stored in an airtight container in the refrigerator for up to 2 weeks or in the freezer for longer storage.
- These bars are firm and travel well, perfect for summer outings!
Tips & Variations
- Nutty Crunch: Add ¼ cup chopped almonds, walnuts, or pistachios to the coconut base.
- Superfood Boost: Sprinkle chia seeds or hemp hearts into the chocolate layer.
- Extra Indulgence: Drizzle with a little melted nut butter before serving.
Why You’ll Love These Bars
- No-Bake & Easy: Minimal effort, maximum flavor.
- Nutrient-Dense: Antioxidants, healthy fats, and fiber in every bite.
- Satisfying Texture: Chewy coconut base, rich chocolate top.
- Perfect for Sharing: Always a hit at summer gatherings!
The beauty of these bars lies in their simplicity – just mix, set, and slice. They’re perfectly portable for beach days or poolside lounging and won’t melt as quickly as traditional chocolate treats.
The bars stay fresh in the refrigerator for up to two weeks, though they rarely last that long. Their rich, satisfying texture makes them a crowd favorite at summer gatherings.
Greek Yogurt Berry Bark
Summer’s classic frozen yogurt gets a vibrant makeover with Greek Yogurt Berry Bark, an invigorating twist that transforms simple ingredients into an Instagram-worthy frozen treat.
This guilt-free dessert combines the protein-rich goodness of Greek yogurt with nature’s candy—fresh berries. The recipe couldn’t be simpler: spread Greek yogurt on a parchment-lined tray, sprinkle with mixed berries, and freeze until solid. When ready to serve, break into rustic shards.
Beyond its stunning appearance, this bark packs serious berry benefits. Strawberries, blueberries, and raspberries’ antioxidants complement the probiotics in yogurt, making this one of summer’s smartest healthy snacks.
Easy recipes like this prove that eating well doesn’t mean sacrificing flavor or fun. Store extras in the freezer for an instant cool-down whenever the temperature soars.
Overnight Oats With Summer Fruits
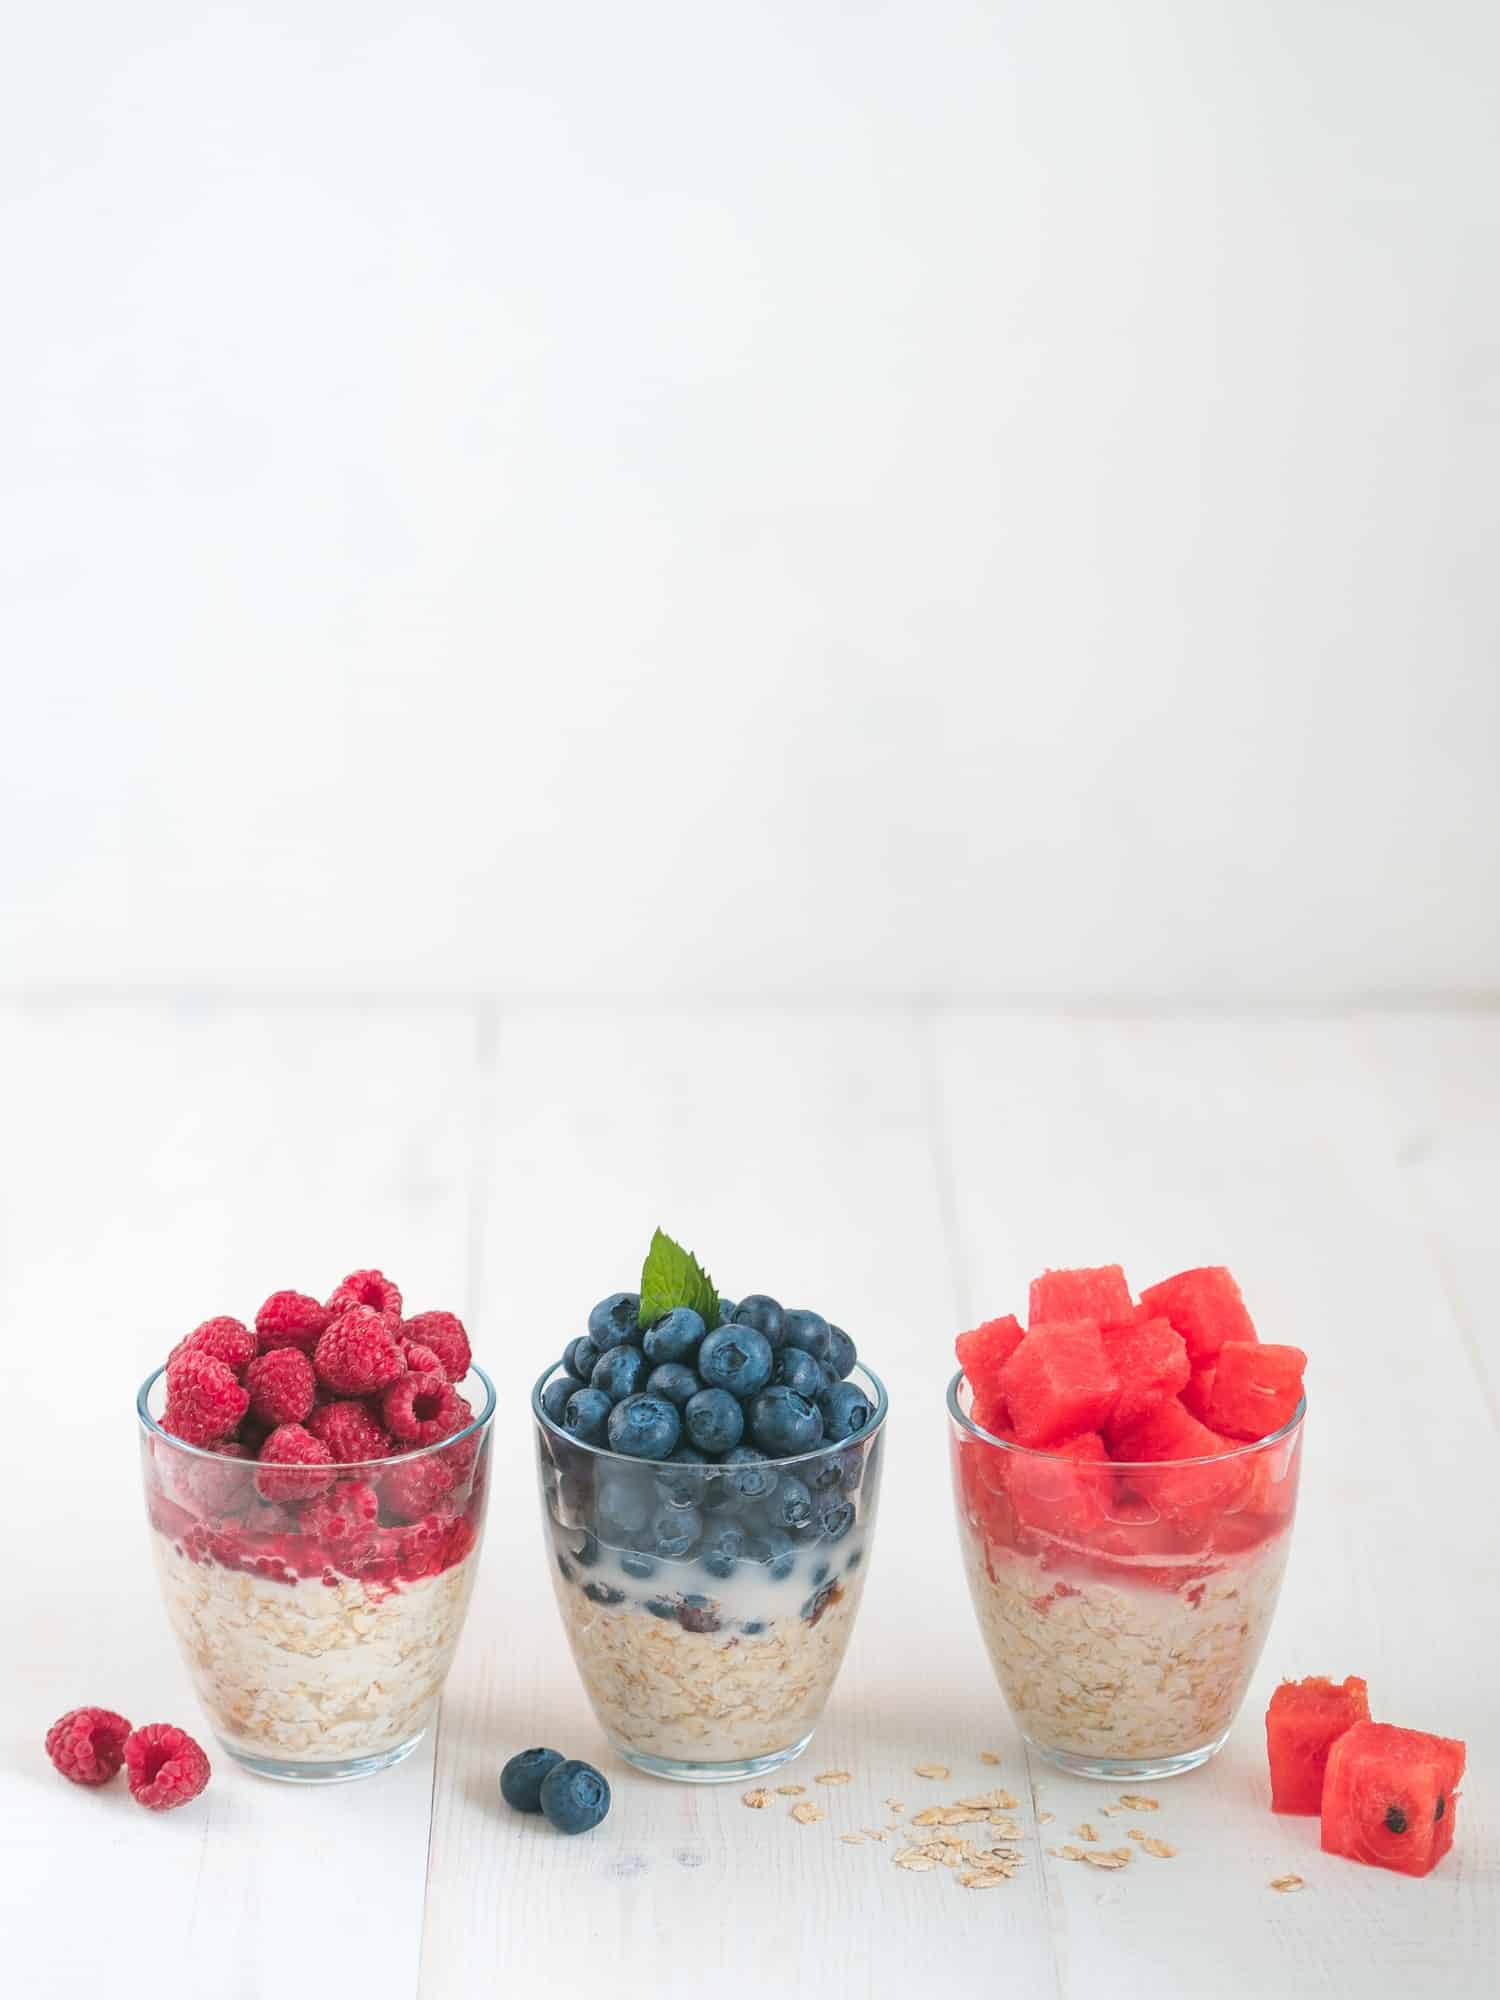
Another brilliantly simple no-cook option takes the breakfast spotlight. Overnight oats transform basic ingredients into a rejuvenating summer breakfast that feels both indulgent and energizing. The beauty lies in its versatility, offering endless flavor variations for those who crave culinary freedom.
| Base Ingredients | Creative Toppings |
|---|---|
| Rolled Oats | Fresh Peaches |
| Plant Milk | Berries & Honey |
| Chia Seeds | Coconut & Mango |
The magic happens while you sleep. Combine the ingredients in a jar the night before, and wake up to perfectly tender oats. Each bowl becomes a personal masterpiece, whether topped with sun-ripened strawberries, fresh mint, or a drizzle of maple syrup. It’s the ideal canvas for experimenting with seasonal fruits and creative combinations, making every summer morning like a mini vacation. Like a 24-hour delay timer found in modern rice cookers, this breakfast option offers convenient meal preparation for busy schedules.
Frozen Fruit Smoothie Bowls
Frozen fruit smoothie bowls transform an ordinary breakfast into an Instagram-worthy creation with their vibrant toppings and endless customization options.
Creating these picture-perfect bowls becomes effortless when using pre-frozen fruit combinations and preparing toppings in advance, making morning assembly a breeze.
Classic pairings like strawberry-banana and tropical mango-pineapple provide reliable foundations, while unexpected combinations such as dragon fruit-coconut and blueberry-lavender offer adventurous alternatives for smoothie bowl enthusiasts.
Colorful Topping Ideas
The artistic presentation of a fruit smoothie bowl truly comes alive with thoughtfully chosen toppings that add both visual appeal and delightful texture contrasts.
Creative garnishing techniques transform an ordinary bowl into an Instagram-worthy masterpiece, using patterns, layers, and strategic placement of ingredients.
Popular toppings include sliced almonds, coconut flakes, vibrant fruit pairings like kiwi stars, and dragon fruit dots. For added crunch, sprinkle granola clusters or chia seeds in elegant swooping lines. Fresh mint leaves provide bursts of color and an invigorating aroma.
The secret to stunning bowls lies in color coordination. Think rainbow-inspired combinations: golden mango, ruby strawberries, and purple acai, creating eye-catching arrangements.
Remember to keep toppings light and evenly distributed—no one wants their smoothie bowl to look like a fruit jungle.
Quick Assembly Tips
Mastering smoothie bowl assembly becomes a breeze with proper preparation and smart shortcuts. Quick kitchen hacks like pre-portioning frozen fruits into ready-to-blend bags can save precious morning minutes. Having frequently used toppings stored in clear containers makes the process flow seamlessly.
Efficient ingredient prep is the secret weapon of smoothie bowl enthusiasts. Washing and cutting fresh fruits the night before prevents rushed, messy attempts at precision slicing. Pro tip: freeze bananas when they are perfectly ripe – they will create the creamiest base texture.
Arrange tools and ingredients in a designated “smoothie station for the fastest route from blender to bowl.” This simple organization method transforms anyone’s kitchen into a smoothie bowl paradise.
Even sleep-deprived souls can create Instagram-worthy bowls in minutes. A well-assembled bowl tastes twice as nice.
Fruit Combinations That Work
While creative smoothie bowl combinations may seem endless, certain fruit pairings consistently deliver magical results in both taste and texture. The key lies in understanding complementary flavor pairings that enhance each fruit’s natural sweetness.
Tropical combinations like mango and pineapple create a vacation-worthy base, while berries and bananas offer a classic smoothie foundation, for those seeking adventure, dragon fruit and coconut deliver an Instagram-worthy purple bowl with a subtle nutty finish.
Seasonal fruits provide the best results. Summer peaches blend beautifully with strawberries, while autumn apples harmonize with blackberries.
The trick is balancing sweet with tart – think blueberries with tart cherries or sweet pear with tangy kiwi.
Let nature be the guide. When fruits ripen together, they usually taste amazing together.
Date and Nut Roll-Ups
Sweet nostalgia rolls into summer kitchens with these delightful date and nut treats, which combine nature’s candy with satisfying crunch.
These no-bake delights pack nut benefits like omega-3s and protein while satisfying sweet cravings without turning on the oven.
The beauty of these roll-ups lies in their versatility. While traditional recipes call for walnuts and Medjool dates, creative roll-up variations can include almonds, pecans, or even pistachios. A sprinkle of coconut or a dash of cinnamon adds unexpected depth.
The process couldn’t be more straightforward: blend, shape, roll, and chill.
These bite-sized treasures keep well in the fridge for up to two weeks, though they rarely last that long. They’re perfect for pool parties or quiet afternoons when the craving for something sweet strikes.
Avocado Chocolate Mousse
This luxurious no-bake avocado chocolate mousse is ready in just five minutes, making it the perfect summer treat when you’re craving something indulgent yet wholesome.
The creamy texture of ripe avocados creates a decadent base while adding heart-healthy fats and nutrients that traditional chocolate mousse can’t match.
Ingredients
- 2 ripe avocados (peeled and pitted)
- ¼ cup unsweetened cocoa powder (or raw cacao powder for extra antioxidants)
- ¼ cup pure maple syrup or honey (adjust to taste)
- 2 teaspoons vanilla extract
- Pinch of sea salt
- 2–4 tablespoons non-dairy milk (almond, oat, or coconut), as needed for blending
Optional Toppings
- Fresh berries
- Shaved dark chocolate
- Coconut whipped cream
- Chopped nuts or cacao nibs
Instructions
1. Blend the Mousse
- Combine avocados, cocoa powder, maple syrup, vanilla, and sea salt in a food processor or high-speed blender.
- Blend until completely smooth and creamy, stopping to scrape down the sides as needed.
- Add non-dairy milk, a tablespoon at a time, until the mousse reaches your desired texture-thick and silky.
2. Taste and Adjust
- Taste the mousse and add more sweetener or cocoa powder if desired. Blend again to combine.
3. Chill and Serve
- Spoon the mousse into serving bowls or glasses.
- Chill in the refrigerator for at least 30 minutes for the best flavor and texture (optional, but recommended).
- Top with berries, chocolate shavings, or your favorite garnish.
Tips & Variations
- Extra Richness: Add two tablespoons of melted dark chocolate to the blender.
- Mocha Twist: Blend in 1 teaspoon instant espresso powder.
- Citrus Zest: Add a little orange or lime zest for a bright flavor note.
- Keto Version: Use a keto-friendly sweetener like stevia or erythritol.
Why You’ll Love It
- Quick & Easy: Ready in 5 minutes, no cooking required.
- Nutrient-Packed: Full of healthy fats, fiber, and antioxidants.
- Indulgent Texture: Silky, rich, and totally satisfying.
- Secretly Healthy: No one will guess it’s made from avocados!
Enjoy your avocado chocolate mousse- a luscious, guilt-free dessert perfect for summer days and special occasions!
When blended with rich cocoa powder and a touch of natural sweetener, this dessert transforms into a velvety confection that will leave guests amazed when they learn its healthy secret ingredient.
Rich Creamy No-Bake Dessert
Looking for a decadent chocolate mousse that’s both healthy and indulgent? This creamy dessert dip takes inspiration from classic no-bake cheesecakes while sneaking in nutrient-rich avocados. The result? A guilt-free treat that satisfies even the most devoted chocolate lovers.
The secret lies in perfectly ripe avocados, which create an impossibly smooth texture without any dairy. Mixed with rich cocoa powder and a touch of natural sweetener, this mousse transforms into a luxurious dessert that no one will guess is actually good for them.
For best results, chill the mousse for at least two hours before serving. Top with fresh berries, coconut flakes, or dark chocolate shavings to elevate this humble dessert into an Instagram-worthy masterpiece.
It’s proof that healthy eating doesn’t mean sacrificing life’s sweet pleasures.
Health Benefits Worth Noting
While dessert lovers may initially be drawn to this mousse’s rich chocolate flavor, the health benefits packed into each creamy spoonful make it truly remarkable.
The avocado base delivers exceptional nutrient density, offering heart-healthy fats and a rich source of vitamins E and K.
During hot summer months, this no-bake treat provides seasonal benefits beyond its cooling effect. Unlike traditional chocolate mousse, the natural ingredients help maintain stable blood sugar levels while delivering a hefty dose of potassium and fiber.
Furthermore, the raw cacao powder used in this recipe contains powerful antioxidants that support brain health and elevate mood.
It’s nature’s way of saying you can have your mousse and eat it, too.
A guilt-free indulgence that actually nourishes the body? No,w that’s something worth celebrating.
Quick Five-Minute Prep
Making this creamy chocolate mousse requires almost no culinary expertise and just five minutes of active preparation time. Among quick meal ideas for the summer, this no-bake treat stands out as both sophisticated and incredibly simple.
The process is wonderfully straightforward: Blend ripe avocados with cocoa powder, maple syrup, and a splash of vanilla extract until silky smooth. That’s it. No complicated techniques or special equipment are needed.
Among summer snack tips, keeping a few avocados ready to ripen on the counter guarantees this treat is always within reach. The result is a decadent dessert that feels luxurious yet takes less time to make than scrolling through social media.
Store the mousse in small mason jars for easy weekly grab-and-go portions.
Fresh Fruit Spring Rolls
These vibrant, fresh fruit spring rolls offer a delightful twist on traditional Vietnamese summer rolls, transforming them into a sweet, uplifting treat perfect for warm weather.
With fresh ingredients like juicy mangoes, strawberries, and mint leaves, these rolls bring nature’s candy right to the table.
The beauty of spring roll variations lies in their versatility.
Mix and match fruits based on what’s in season, or create themed combinations like tropical paradise with pineapple and coconut, or berry bliss with mixed summer berries.
The rice paper wrapping creates an elegant, translucent window to the colorful fruits within.
Paired with a honey-lime dipping sauce or coconut cream, these rolls transform ordinary fruit into an Instagram-worthy dessert that’s both invigorating and fun to eat.
Refrigerator Oatmeal Cookies (No-Bake, Chilled Version)
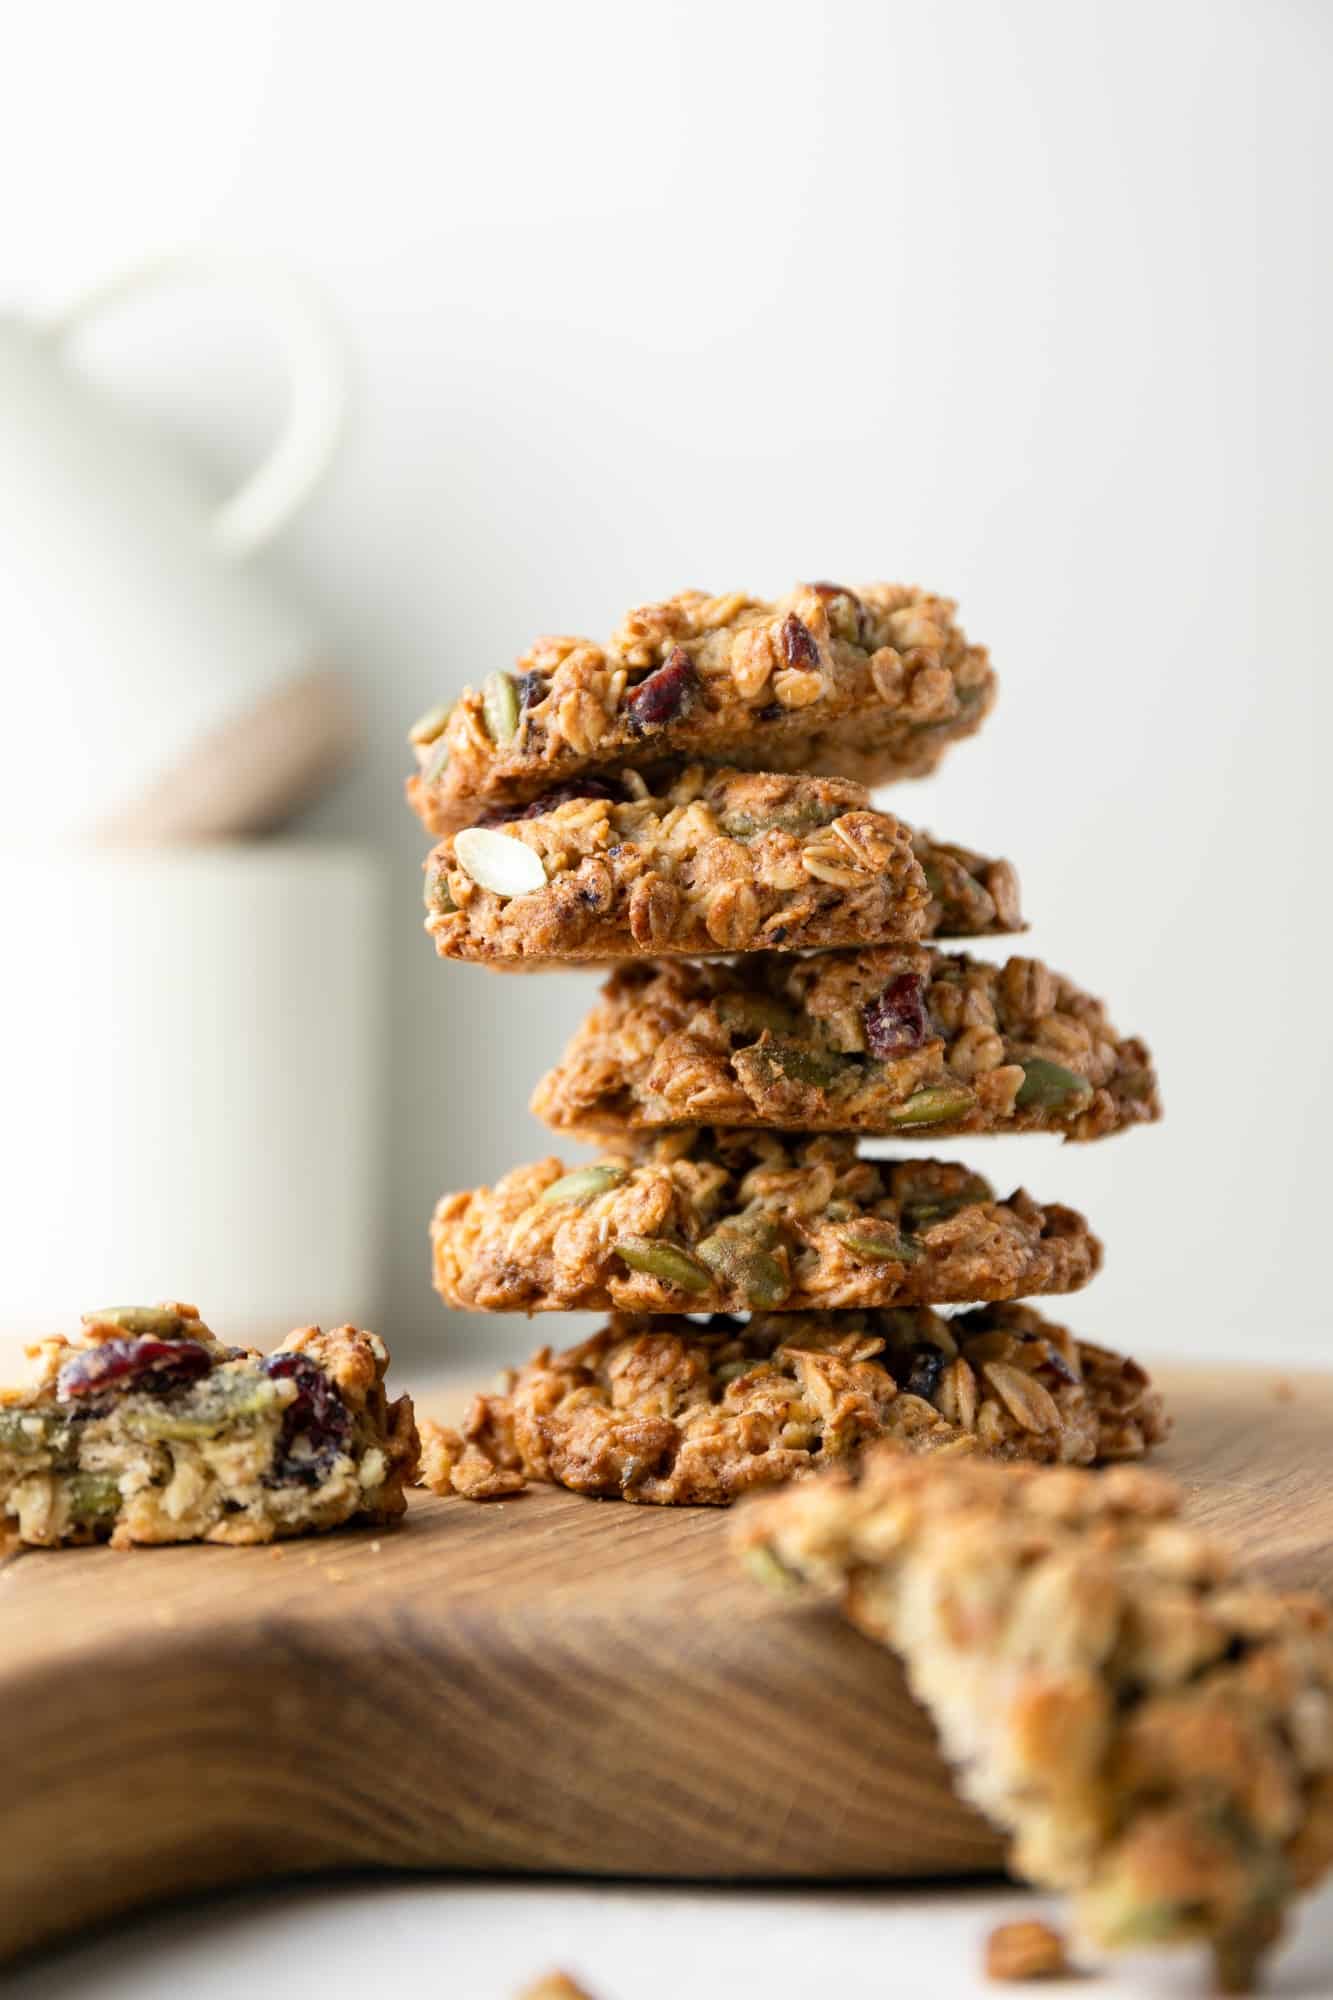
When summer heat makes turning on the oven feel like torture, refrigerator oatmeal cookies step in as the perfect no-bake solution.
These chewy, satisfying summer treats come together in minutes and chill while you relax in the AC.
The versatility of oatmeal flavorings makes these cookies endlessly customizable:
From classic to creative, oatmeal cookies are a blank canvas waiting for your favorite mix-ins and flavor combinations.
- Classic raisins and cinnamon for the traditionalist
- Chocolate chips and peanut butter for decadent cravings
- Dried cranberries and white chocolate for a sophisticated twist
Refrigerator Oatmeal Cookies (No-Bake, Chilled Version)
Ingredients
- 2 cups granulated sugar
- 6 tablespoons unsweetened cocoa powder
- 1/2 cup vegetable oil spread or butter
- 1/2 cup milk
- 3 cups quick or old-fashioned oats uncooked
- 1 cup chopped hazelnuts or walnuts, pecans, or omit for nut-free
- 2/3 cup chocolate-hazelnut spread or peanut butter for a classic twist
- 1 teaspoon vanilla extract
Equipment
- Large mixing bowl (for combining ingredients)
- Measuring cups and measuring spoons (for accurate ingredient measurement)
- Wooden Spoon or Spatula (for mixing by hand, or use a mixer)
- Electric mixer or stand mixer (optional, for creaming butter and sugars; hand mixing is also possible)
- Parchment paper, waxed paper, or freezer paper (for rolling dough logs and/or lining cookie sheets)
- Cookie sheets (for chilling and/or baking cookies)
- Plastic wrap or airtight container (for storing dough or finished cookies in the refrigerator)
- Knife (for slicing dough, if making slice-and-bake style)
- Cookie scoop or tablespoon (for portioning dough, optional)
- Wire cooling rack (for cooling cookies after baking, if baking)
Method
- Prepare Cookie Sheets:
- Line 3 cookie sheets with waxed paper and set aside.
- Cook Base Mixture:
- In a large saucepan, combine the sugar, cocoa powder, vegetable oil spread, and milk.
- Cook and stir over medium heat until the mixture comes to a full boil.
- Continue boiling for 1 minute without stirring.
- Add Oats and Mix-ins:
- Remove the pan from heat.
- Immediately add the oats, hazelnuts, chocolate-hazelnut spread (or peanut butter), and vanilla.
- Mix well until everything is evenly combined.
- Form Cookies:
- Working quickly, drop the mixture by rounded tablespoonfuls onto the prepared cookie sheets.
- Chill:
- Refrigerate the cookies until well chilled and set.
- Store:
- Transfer cookies to an airtight container, separating layers with waxed paper.
- Store in the refrigerator for up to two weeks-the texture actually improves after a day or two as the flavors meld together.
Nutrition
Notes
- If you’re making classic no-bake refrigerator oatmeal cookies, expect about 10 minutes of prep and at least 1–2 hours of chilling.
- If you’re making the slice-and-bake style, plan for 10–15 minutes prep, 2 hours to overnight chilling, and 8–12 minutes baking per batch.
- For best flavor and texture, chilling overnight is recommended.
Tried this recipe?
Let us know how it was!Cookie storage couldn’t be simpler – just keep them in an airtight container in the fridge for up to two weeks.
The texture actually improves after a day or two as the flavors meld together.
One batch makes enough to share, though they’re so good you might want to hide a few for yourself.
Mason Jar Fruit Trifles
Layered desserts reach new heights of summer sophistication in portable Mason jar trifles. These charming single-serve treats combine fresh seasonal fruit choices with layers of cake, pudding, and whipped cream for an impressive presentation that’s perfect for outdoor gatherings.
The key to stunning trifles lies in mastering simple layering techniques. Start with cubed pound cake or angel food cake as the base, followed by alternating layers of fresh berries, stone fruits, or tropical selections. Each layer should be distinct and visible through the clear glass.
For best results, chill the jars for at least two hours before serving. The beauty of these portable parfaits is their versatility – they can be assembled the night before a beach day or picnic, making them the ultimate grab-and-go summer dessert.
No-Bake Summer Treat FAQs
How Long Can These No-Bake Summer Treats Be Stored in the Refrigerator?
No-bake treats typically maintain ideal refrigerator storage for 5-7 days when properly sealed. Their shelf life varies by ingredients, but most remain fresh and enjoyable when kept chilled, offering convenient grab-and-go summer refreshments.
What Are the Best Substitutes for Nuts in These Recipes?
Common nut alternatives include seeds (sunflower, pumpkin), crispy rice cereal, pretzels, or toasted coconut flakes. These substitutes maintain similar flavor profiles and textures while offering freedom for those with dietary restrictions.
Can Frozen Fruits Be Used Instead of Fresh Ones?
Like a treasure chest of winter-stored gems, frozen fruits offer excellent alternatives to fresh ones. These convenient substitutes retain nutrients and flavor, making them perfect for spontaneous recipe adventures with comparable taste and texture benefits.
Are These Treats Suitable for Diabetics?
Many summer treats can be made diabetic-friendly by using sugar substitutes like stevia, monk fruit, or erythritol. However, individuals should always consult their healthcare provider regarding specific dietary modifications.
What Kitchen Tools Are Essential for Making These No-Bake Desserts?
Essential no-bake dessert tools include a reliable blender or food processor, mixing bowls, measuring cups, cooling racks, and spatulas. Multiple blender options exist, from budget-friendly to professional-grade, offering flexibility in preparation methods.
Summing Up No-Bake Summer Treats
Summer’s sweetest moments unfold without ever touching a dial or preheating an oven. From vibrant berry parfaits to creamy avocado chocolate mousse, these no-bake summer treats transform ordinary ingredients into extraordinary delights. As the sun blazes outside, these cool, invigorating desserts offer a delicious escape. Whether layered in mason jars or rolled with fresh fruits, each recipe proves that sometimes the most memorable treats come from keeping things beautifully simple and perfectly cool.


