
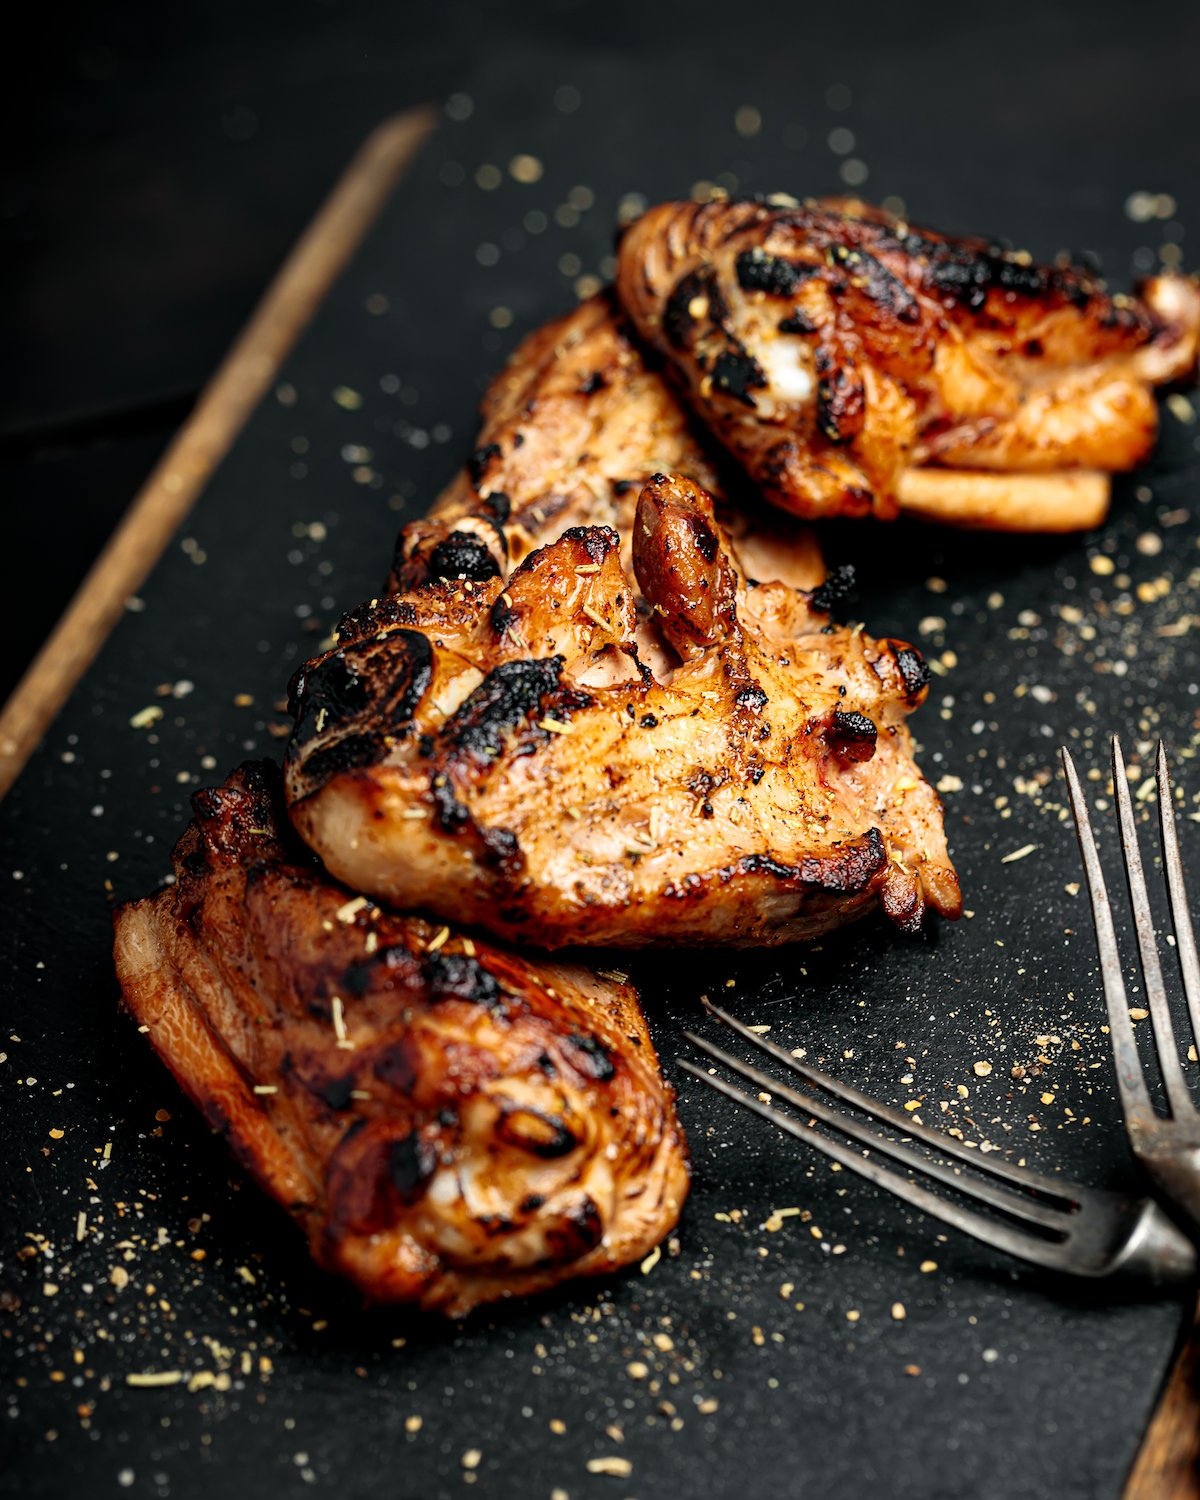
I’ll teach you to grill chicken thighs that’ll make your taste buds dance with joy in just 15 minutes. Start by pounding those thighs to a ¼-inch thickness, then season with olive oil, rosemary, salt, and pepper. Grill on medium-high heat for 3-5 minutes per side until they hit 165°F internally. Let them rest for 5 minutes – patience pays off here. These protein-packed beauties pair wonderfully with roasted vegetables or a crisp salad, and there’s so much more to discover.
Why You Will Love This At Lunchtime (or Dinner)
When you’re looking for a meal that’s both satisfying and quick, these grilled chicken thighs deliver exactly what you need. I’ll be honest—there’s something magical about chicken that cooks in under ten minutes yet tastes like you’ve been slaving away all afternoon. The pounding technique creates tender, juicy meat that beautifully absorbs the aromatic flavors of rosemary. Whether you’re rushing through lunch or winding down for dinner, this recipe won’t leave you hanging. Plus, you can prep everything hours ahead, which means less stress and more time actually to enjoy your perfectly grilled, restaurant-quality chicken.
Recipe for Succulent Grilled Chicken Thighs

Succulent Grilled Chicken Thighs
Ingredients
Equipment
Method
- Place chicken thighs between two sheets of plastic wrap or waxed paper. Use a meat mallet to pound the chicken until it reaches an even 1/4 inch thickness throughout. This ensures even cooking.
- Drizzle olive oil generously over the flattened chicken, coating both sides. Sprinkle rosemary, salt, and pepper evenly across the surface, pressing the seasonings gently into the meat. If prepping ahead, cover and refrigerate for up to four hours.
- Preheat your barbecue grill to medium-high heat (about 10-15 minutes for gas grills). For charcoal, arrange coals for consistent heat across the cooking surface.
- Place the seasoned chicken thighs on the hot grill. Grill for 3-5 minutes per side, checking for a golden-brown color and an internal temperature of 165°F.
- Remove the grilled chicken thighs from the heat and let them rest for about 5 minutes. This allows the juices to redistribute, ensuring each bite is tender and moist.
Nutrition
Notes
Tried this recipe?
Let us know how it was!
When you’re craving juicy, flavorful chicken that doesn’t require hours of fuss, grilled chicken thighs are your answer. This recipe takes just 15 minutes of prep time and 10 minutes of cooking, making it perfect for busy weeknights or weekend barbecues. The secret lies in pounding the chicken to an even thickness, which guarantees perfectly cooked meat every single time.
What makes this recipe truly shine is its simplicity. We’re talking about a handful of ingredients that transform ordinary chicken thighs into something restaurant-worthy. The combination of olive oil, fresh rosemary, salt, and pepper creates a classic Mediterranean flavor profile that never gets old. Plus, you can prep everything up to four hours ahead, which means less stress when it’s time to fire up the grill.
The pounding technique might seem like extra work, but trust me on this one. It’s the difference between uneven, rubbery chicken and tender, evenly cooked perfection that’ll have everyone asking for seconds.
Ingredients:
- Chicken thighs
- Olive oil
- Fresh rosemary
- Salt
- Black pepper
Equipment/Tools:
- Plastic wrap or waxed paper
- Meat mallet
- Barbecue grill
Instructions:
Start by placing your chicken thighs between two sheets of plastic wrap or waxed paper, then grab your meat mallet and pound the chicken until it reaches an even 1/4 inch thickness throughout – this step is vital for even cooking, so don’t skip it even if your arm gets tired.
Once you’ve achieved that perfect thickness, drizzle olive oil generously over the flattened chicken, making sure to coat both sides thoroughly. Sprinkle the rosemary evenly across the surface, followed by a good seasoning of salt and pepper, pressing the seasonings gently into the meat so they adhere properly.
If you’re planning ahead, this is the perfect stopping point since the seasoned chicken can be covered and refrigerated for up to four hours, which actually helps the flavors penetrate deeper into the meat.
When you’re ready to cook, prepare your barbecue for medium-high heat and let it get nice and hot before adding the chicken.
Grill the seasoned thighs for 3 to 5 minutes per side, watching carefully for that beautiful golden-brown color and checking that the internal temperature reaches 165°F before removing from the grill.
Nutrition Information:
- High in protein
- Contains healthy monounsaturated fats from olive oil
- Rich in antioxidants from rosemary
- Low in carbohydrates
- Good source of B vitamins and selenium
Tips:
Don’t be afraid to really pound that chicken – the more even the thickness, the more evenly it’ll cook. If you don’t have a meat mallet, the bottom of a heavy skillet works in a pinch, though it won’t be quite as effective. Make sure your grill is preheated correctly before adding the chicken; otherwise, you’ll end up with sad, steamed meat instead of beautifully charred thighs. You can easily swap the rosemary for other herbs like thyme, oregano, or even a spice blend if that’s what you have on hand. The make-ahead option is a real game-changer for meal prep – just season a bunch of thighs on Sunday and you’ll have quick dinners ready to grill all week long.
Cooking Steps
I’ll walk you through the simple steps that transform ordinary chicken thighs into grilled perfection. First, we’re going to give those thighs a gentle pounding—don’t worry, they can take it—before seasoning them with oil and herbs that’ll make your taste buds do a happy dance. Then it’s onto the grill for just a few minutes per side, because nobody wants to turn juicy chicken into rubber boots.
Step 1. Pound Chicken to Thickness

First things first, you’ll want to place those chicken thighs between two sheets of plastic wrap or waxed paper—think of it as giving your chicken a little protective sandwich before the real work begins. Now grab your meat mallet (or rolling pin if you’re improvising) and start pounding away until each thigh reaches that magic quarter-inch thickness. Don’t go crazy here—we’re tenderizing, not obliterating. This flattening technique guarantees even cooking on the grill, preventing those dreaded thick spots that stay pink while everything else turns to leather. Your future self will thank you.
Step 2. Season With Oil and Herbs

With your chicken now perfectly flattened, it’s time to give those thighs the flavor treatment they deserve. I drizzle olive oil generously over each piece—don’t be shy here, folks. The oil helps create that gorgeous golden crust we’re after. Next comes the aromatic rosemary, which I sprinkle like I’m blessing these beauties for grill greatness—a good pinch of salt and pepper rounds out our simple yet stellar seasoning trio. Here’s a pro tip: you can prep these seasoned thighs up to four hours ahead and let them chill in the fridge, marinating in their flavorful goodness.
Step 3. Prepare Barbecue Medium High Heat

Once your chicken has soaked up all those delicious flavors, it’s time to fire up the grill and get this show on the road. I’m talking medium-high heat here – not volcano hot, not lukewarm camping fire. You want those flames dancing with purpose, ready to create beautiful char marks without turning your chicken into charcoal briquettes. If you’re using a gas grill, preheat it for about 10-15 minutes. For charcoal enthusiasts, arrange the coals so that you have consistent heat across your cooking surface. The grill’s ready when you can hold your hand five inches above the grates for just 3-4 seconds.
Step 4. Grill Chicken 3-5 Minutes

Now comes the moment of truth – placing those beautifully seasoned chicken thighs onto the hot grates. I carefully lay each piece down, listening for that satisfying sizzle that tells me the grill’s ready for action. Here’s where patience becomes your best friend – resist the urge to flip too early! I cook them for 3-5 minutes per side, watching for those gorgeous grill marks to develop. The exact timing depends on thickness, but when the internal temperature hits 165°F, you’re golden. Trust the process, and you’ll have juicy, perfectly grilled chicken that’ll make your taste buds dance.
Step 4. Let Rest Before Serving

After removing those perfectly grilled chicken thighs from the heat, I resist every fiber of my being that’s screaming “eat now!” and instead let them rest for about 5 minutes. This brief pause allows the juices to redistribute throughout the meat, ensuring each bite stays tender and moist rather than watching all that flavor escape onto your plate. I know it’s torture when that rosemary aroma is calling your name, but trust me. This moment of patience transforms good chicken into absolutely spectacular chicken that’ll have everyone asking for your secret.
Helpful Tips
Why settle for dry, rubbery chicken when a few simple tricks can transform your grilled thighs into juicy perfection? I’ve learned that pounding chicken to an even thickness isn’t just a chef showing off—it guarantees uniform cooking. Don’t skip the marinating step; even thirty minutes makes a difference, though four hours is ideal. Here’s my secret: resist the urge to flip constantly. Let each side develop those gorgeous grill marks before turning. And please, use a meat thermometer! Guessing doneness is like playing culinary roulette. Finally, tent with foil after grilling—patience pays off with incredibly tender, flavorful results.
Succulent Grilled Chicken Thighs Pairings
When these perfectly grilled chicken thighs hit your plate, they’re practically begging for the proper companions to complete the picture. I love pairing them with roasted vegetables like zucchini, bell peppers, or asparagus—the char from the grill plays beautifully with caramelized veggies. A fresh salad with lemon vinaigrette cuts through the richness perfectly. For heartier appetites, garlic mashed potatoes or wild rice pilaf make excellent sidekicks. Don’t forget the wine! A crisp Sauvignon Blanc or light Pinot Noir complements the rosemary beautifully. Trust me, these combinations turn a simple dinner into something special. If you have leftovers, slice the chicken and add it to customizable grain bowls with quinoa or brown rice for an impressive work lunch the next day.
Summing it up
Looking back at this journey from raw chicken to grilled perfection, I can’t help but smile at how something so straightforward delivers such impressive results. We’ve covered the essentials: selecting quality thighs, mastering the pound-and-season technique, and nailing those vital grill timings. The beauty lies in simplicity—just olive oil, rosemary, salt, and pepper transform ordinary chicken into something extraordinary. Whether you’re feeding family or impressing guests, these techniques guarantee success. Remember, good grilling isn’t about complexity; it’s about understanding your ingredients and respecting the process. These grilled chicken thighs make an excellent foundation for nutritious meals that can boost your energy and productivity throughout the workday. Now go forth and create some delicious memories, one perfectly grilled thigh at a time.
